5 Best DIY Tomato Trellis Raised Bed Ideas

Tired of flimsy cages that tip over the second your tomatoes get heavy? Sick of tying knots every week just to keep vines off the ground?
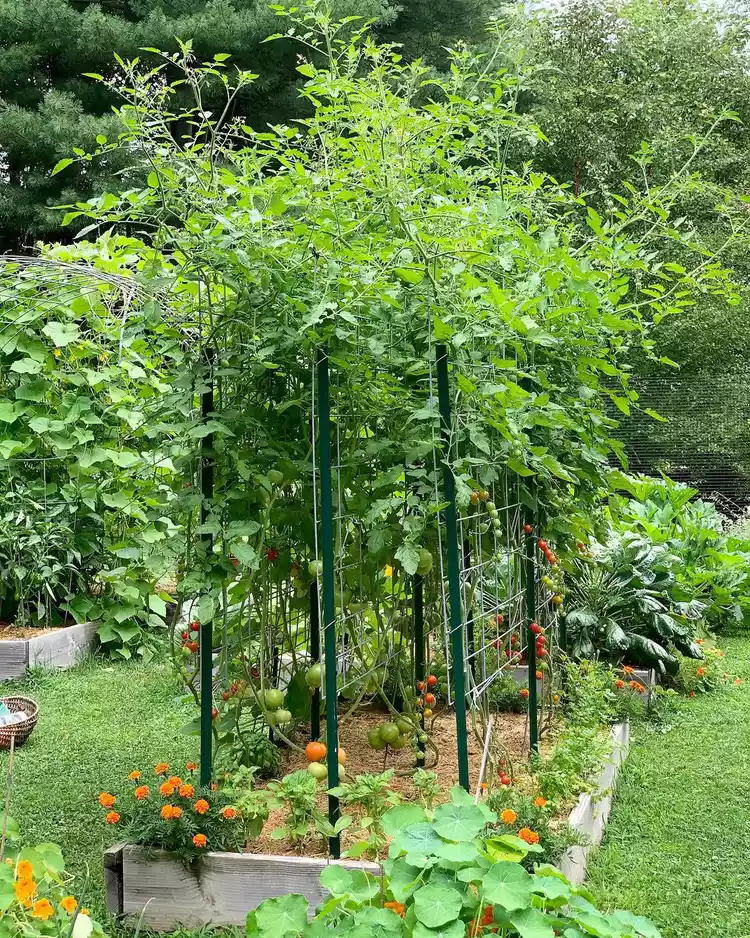
Raised beds deserve better support than a wobbly wire cage from the garden center. I ditched those years ago after watching one topple mid-July, tomatoes and all.
5 DIY trellis ideas fixed that problem for good, and I’m sharing every one below.
Sturdy stakes, bendable panels, even a leftover pallet can outperform anything store-bought. Building your own trellis costs less, lasts longer, and fits your raised bed perfectly.
Grab a hammer, because your tomatoes are about to get the support they’ve been begging for.
1. Wooden Stake and Metal Post Combo Trellis
Sturdy support starts with wood and steel working together. Pound 3 four-foot wooden stakes near each tomato right after planting.
One goes next to the stem. Two more sit 10 to 12 inches on either side, forming a straight line down your raised bed.
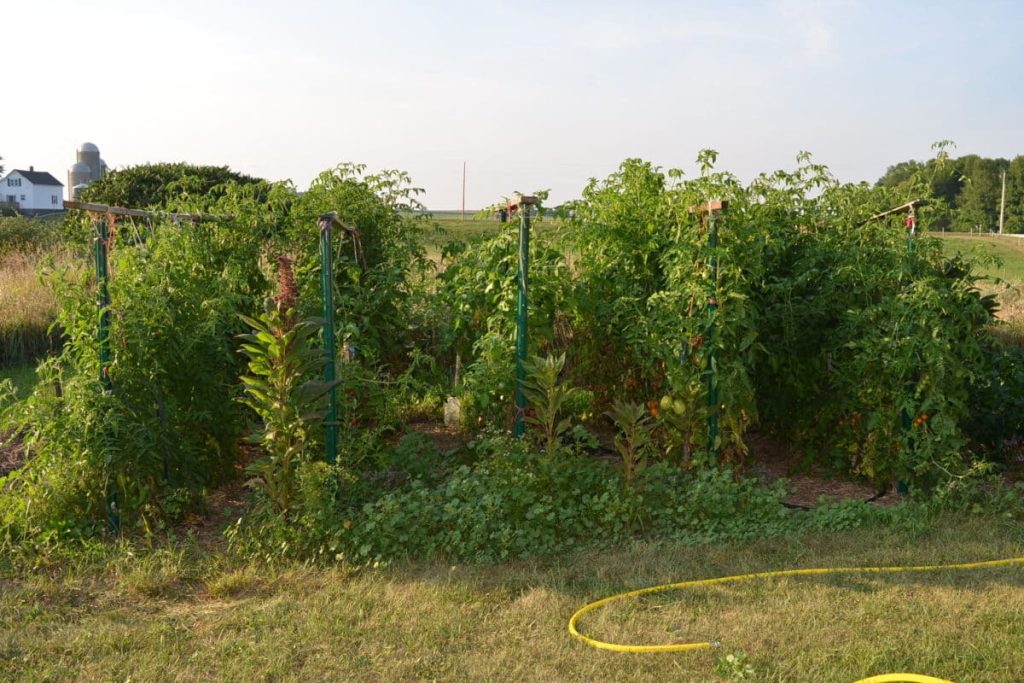
Wait until your plants hit about a foot tall. Then drive 6 to 7 foot steel fence posts every 5 feet along the row. Turning the posts sideways gives you a wider ledge for the top crosspiece.
A wooden crosspiece ties the whole structure together at the top. Attach it with wire or cloth strips, and you’ve got a frame that won’t budge.
Cloth strips work best for tying up the plants themselves because they stretch without cutting into stems. Old t-shirts or sweatpants cut into strips do the job for free.
This system holds tomatoes at 5 to 6 feet without collapsing under heavy fruit. Raised beds actually make this easier since the soil sits looser and stakes go in without a fight.
Pruning the tops keeps everything contained if your bed runs short on space.
Also read: How to Grow Tomatoes in Raised Bed? A Step By Step Guide
2. Cattle Panel Arch Trellis
Ever seen a tomato plant grow up and over like a leafy tunnel?
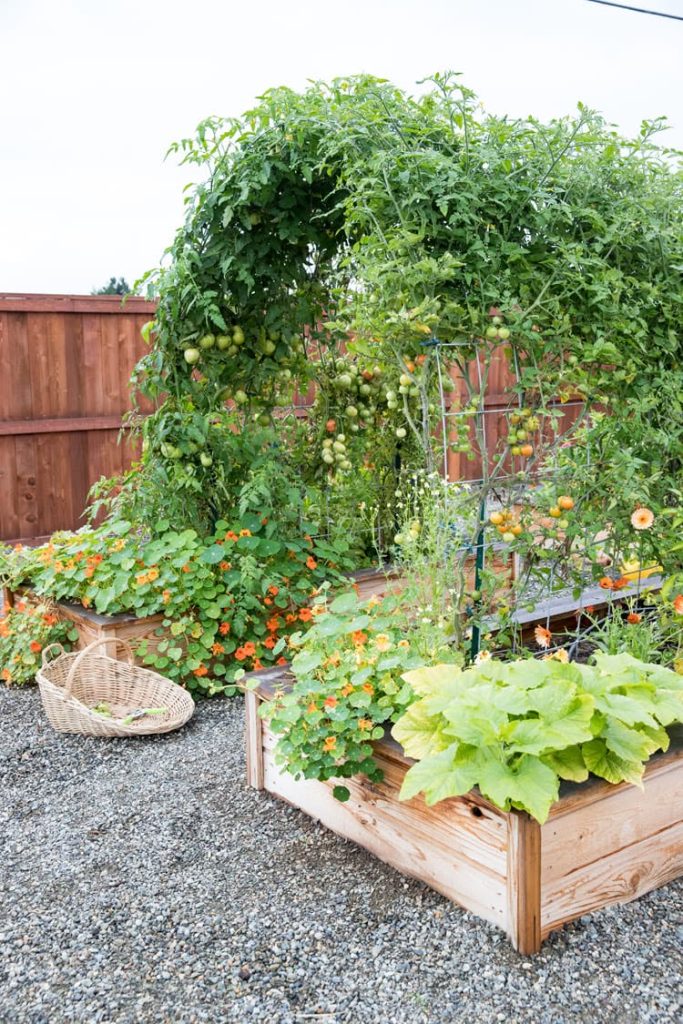
That’s what a cattle panel arch delivers, and raised beds are perfect for anchoring one. Cattle panels go by other names too, including hog panels, livestock panels, or stockade panels depending on your local farm store.
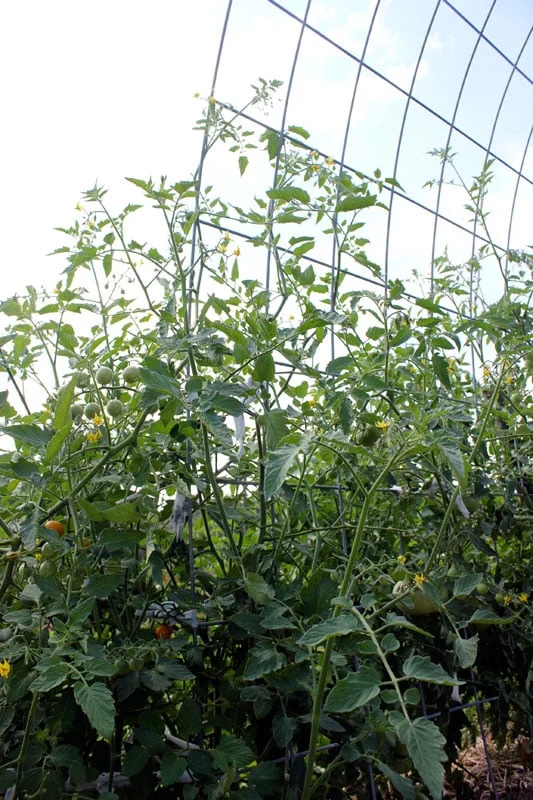
Buy panels in 8 to 16 foot lengths and bend them into an arch shape over your bed. Two metal T-posts on each side hold the arch firmly in the ground.
Heavier duty T-posts beat the lighter U-posts, which tend to bend once tomatoes load up with fruit.
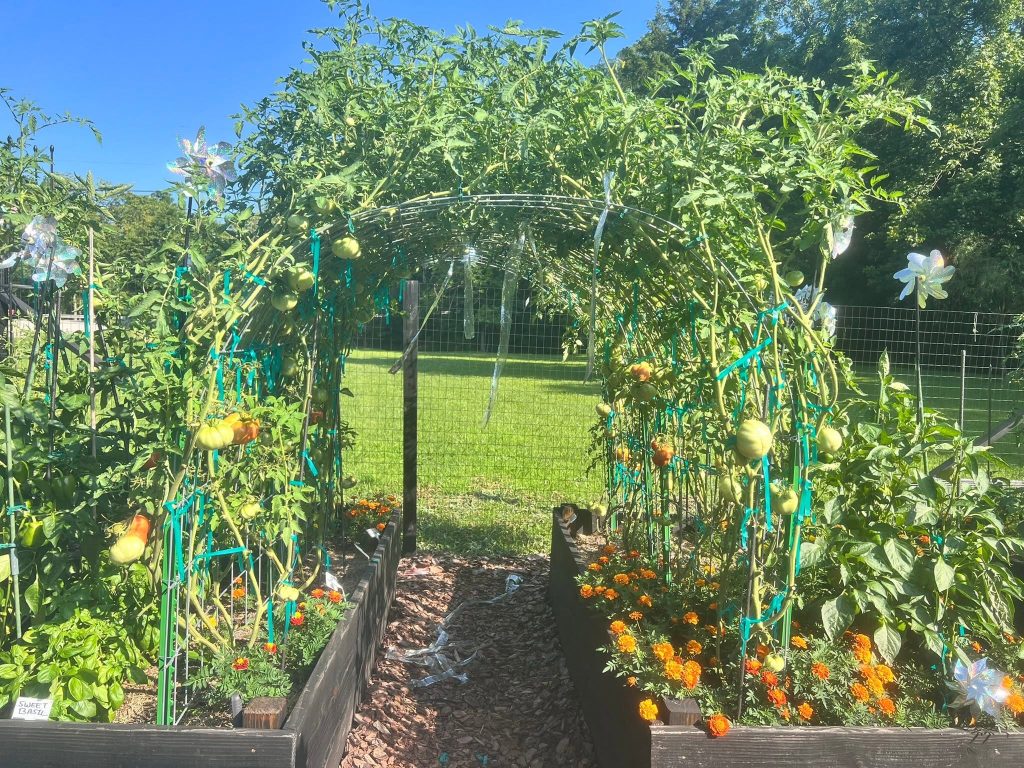
Bending the panel alone is tough work. Grab a second person, or lean the panel against something solid and let gravity help curve it into place.
Once it’s up, zip ties lash the panel to each post at 3 or 4 spots for a rock-solid connection.
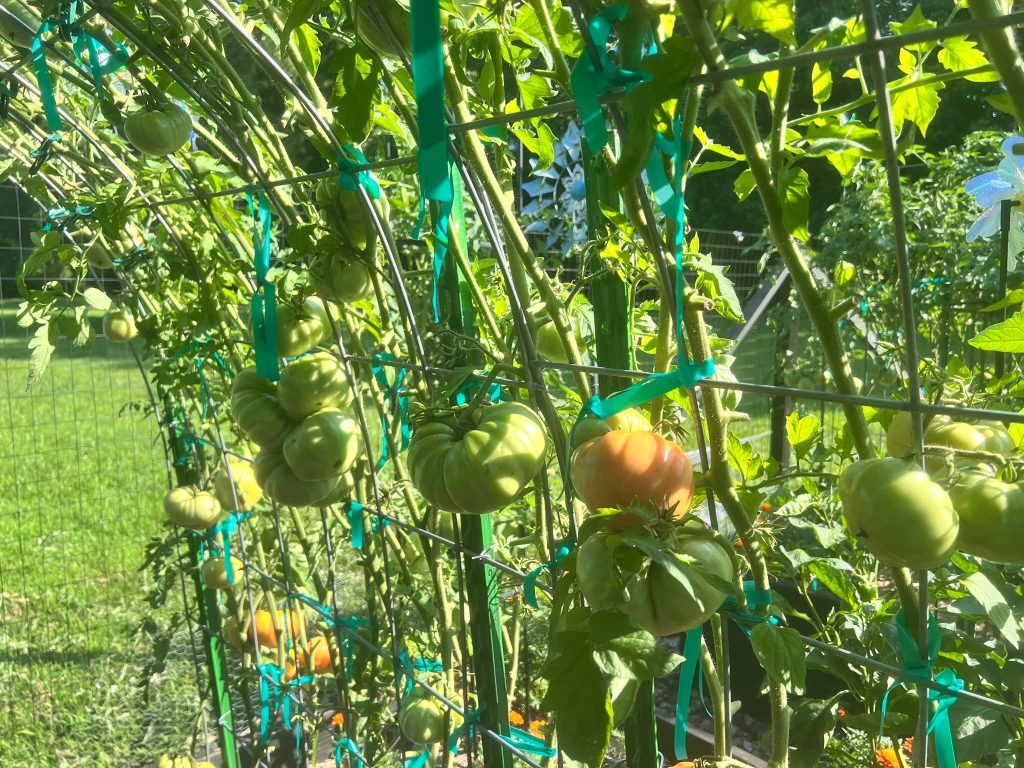
Vining plants love climbing an arch naturally. Weave the stems through the openings as they grow, and you’ll barely need extra ties.
Airflow underneath the arch keeps blight away, and harvesting turns into a stroll instead of a wrestling match.
Read more: 10 Most Effective Tomato Trellis Ideas to Provide Support and Style
3. Panel and Bungee Cord Trellis
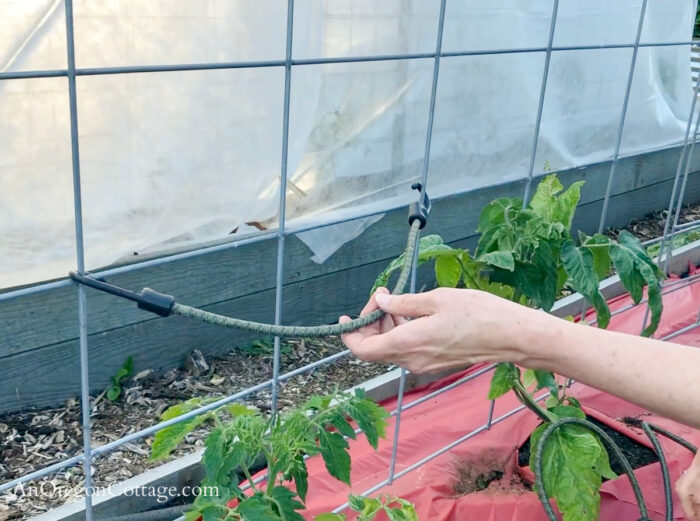
Forget tying knots every single day. Bungee cords make trellising almost effortless, and they work great with metal panels in a raised bed. Anyone can build this one in an afternoon, even on a first try.
Materials
- Cattle or hog panels form the backbone of this trellis. Pick one long enough to span your raised bed. T-posts hold the panel upright, and you’ll need one every 6 feet.
- Black zip ties attach the panel to the posts. Black plastic resists sun damage better than clear or white ties. Bungee cords in a few sizes handle the actual plant training.
- Small, thin cords work for young seedlings. Bigger, thicker cords take over once plants grow taller. A pair of work gloves protects your hands while you’re driving posts and cutting wire.
Instructions
Step 1: Set your posts. Drive T-posts into the soil along your raised bed. Space them 6 feet apart, and sink each one at least a foot deep for stability.
Step 2: Attach the panel. Lift the cattle panel against the posts. Push it up as high as it goes for maximum height. A helper makes this step much easier.
Step 3: Secure with zip ties. Wrap a zip tie around the post and through the panel wire. Repeat this at three or four spots per post. Pull each tie tight so nothing shifts later.
Step 4: Start your bungee cords early. Wrap a thin bungee cord loosely around the tomato stem once it reaches 8 to 10 inches tall. Hook the other end to the panel. Leave slack so the stem can keep growing without strain.
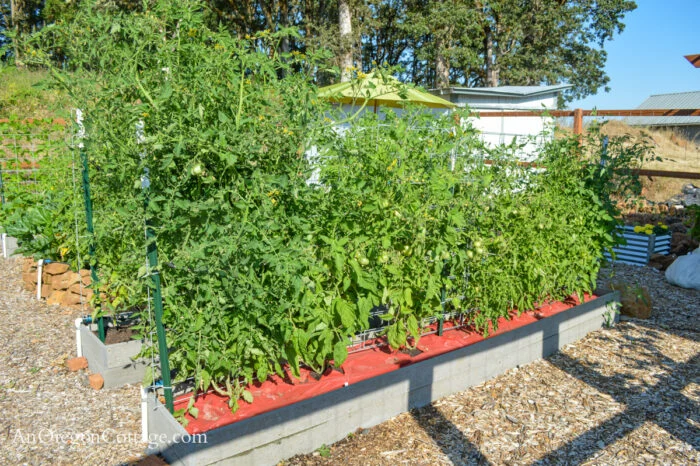
Step 5: Size up as your plant grows. Add a new bungee cord higher on the plant every week or two. Swap in a thicker cord once the vine gets heavy. Never remove the old cord until the new one is holding the plant steady.
Step 6: Adjust wayward branches anytime. Unhook the bungee if a branch grows in the wrong direction. Guide the stem back toward the panel. Rehook the cord, and you’re done in seconds.
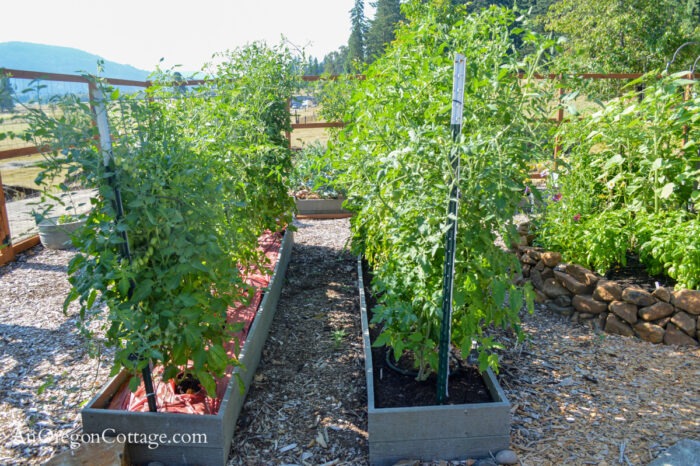
Note: Long, narrow raised beds pair beautifully with this setup. A 2-foot wide bed lets you reach every tomato from either side without stretching.
Air moves freely through skinny beds too, which cuts down on the blight that thrives in cramped, humid spots.
Also read: How to Grow Tomatoes in Containers (A Beginners Guide)
4. Recycled Pallet Trellis
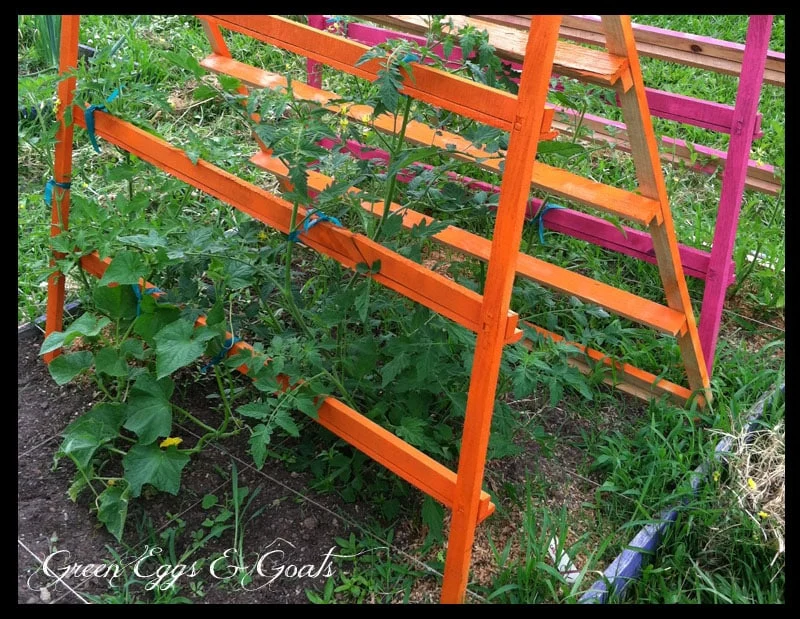
Free materials sitting in your garage might already solve your trellis problem. Wooden pallets turn into sturdy, budget-friendly supports with just a little creativity.
Grab a couple of pallets from a hardware store or moving company, since many give them away for free.
Stand a pallet upright at the back of your raised bed. Sink the bottom edge a few inches into the soil for stability, or brace it against a fence post for extra strength. The gaps between the slats work as natural climbing spots for vines.
Tomatoes weave through the slats as they grow taller. Guide the stems through the openings by hand every week or so. Cloth strips secure any branches that wander away from the pallet on their own.
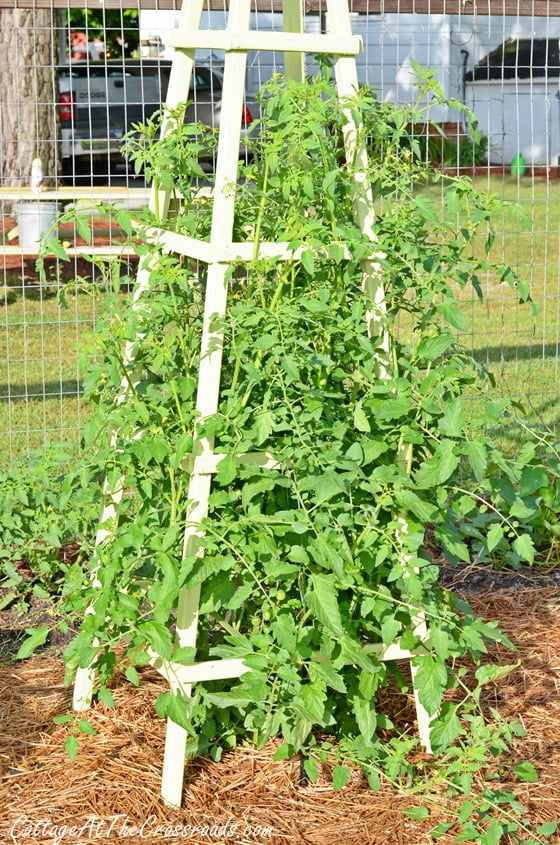
Cost matters to a lot of gardeners, and pallets beat store-bought trellises by a mile. Zero dollars buys you a trellis that holds tomatoes just as well as anything from a garden center. Sturdiness depends on the pallet’s condition, so pick ones without rot or cracked slats.
5. Trellis Archway With Wood and Metal Posts
Some gardeners want beauty and function in one package. A wooden archway delivers both, and it turns a simple raised bed into a garden showpiece.
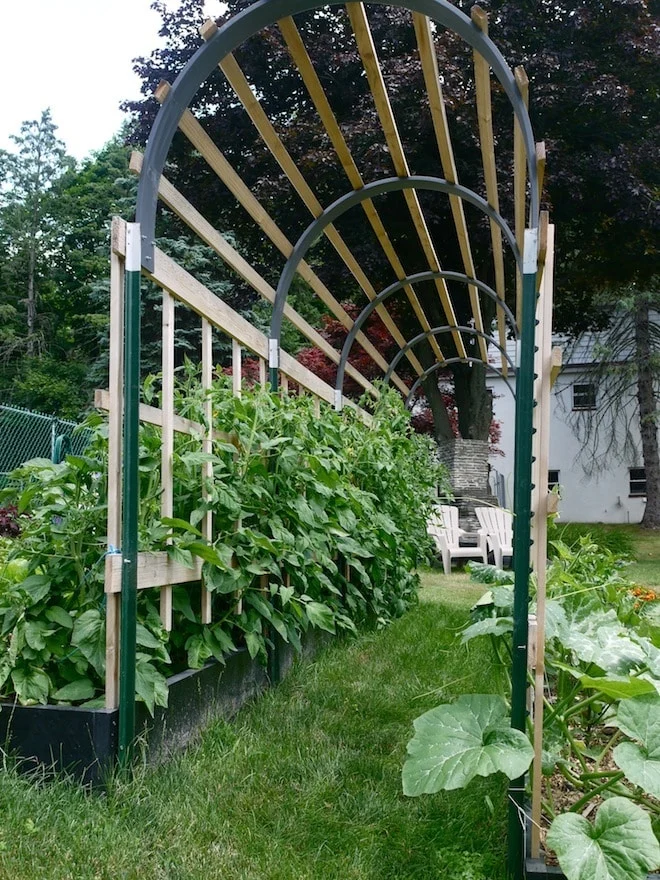
Build the upright sides from wood, then anchor them directly into the corners of your raised bed frame.
Metal fence posts driven alongside the wood give the whole structure extra backbone. Wind and heavy fruit won’t tip this design over easily. PVC pipe works as a lighter substitute if you want something easier to move each season.
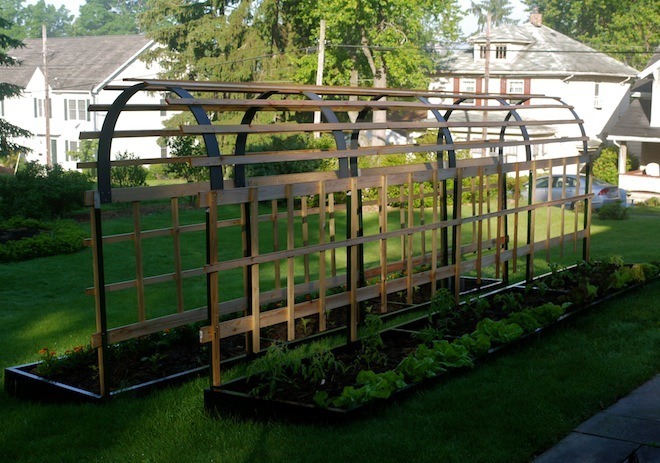
Curved tops on an archway look stunning covered in vines. Tomatoes climb one side, arc over the top, and drape down the other. Visitors to your garden will ask about it, guaranteed.
This trellis style shines in a raised bed thanks to the built-in frame for anchoring posts. Sturdy corners give you a head start on stability.
Reusing the same archway year after year saves money over buying flimsy cages every spring.
You can learn more about this method from here.
Why Bother Trellising Tomatoes At All?
Skeptical gardeners often skip trellising and let plants sprawl across the ground. That decision costs you fruit, though, in more ways than one.
Sprawling tomatoes touch damp soil, and damp soil breeds disease fast.
Blight loves a crowded, humid tomato patch. Airflow around trellised plants keeps leaves dry and fungal problems away. Fewer diseases mean a longer harvest season for you.
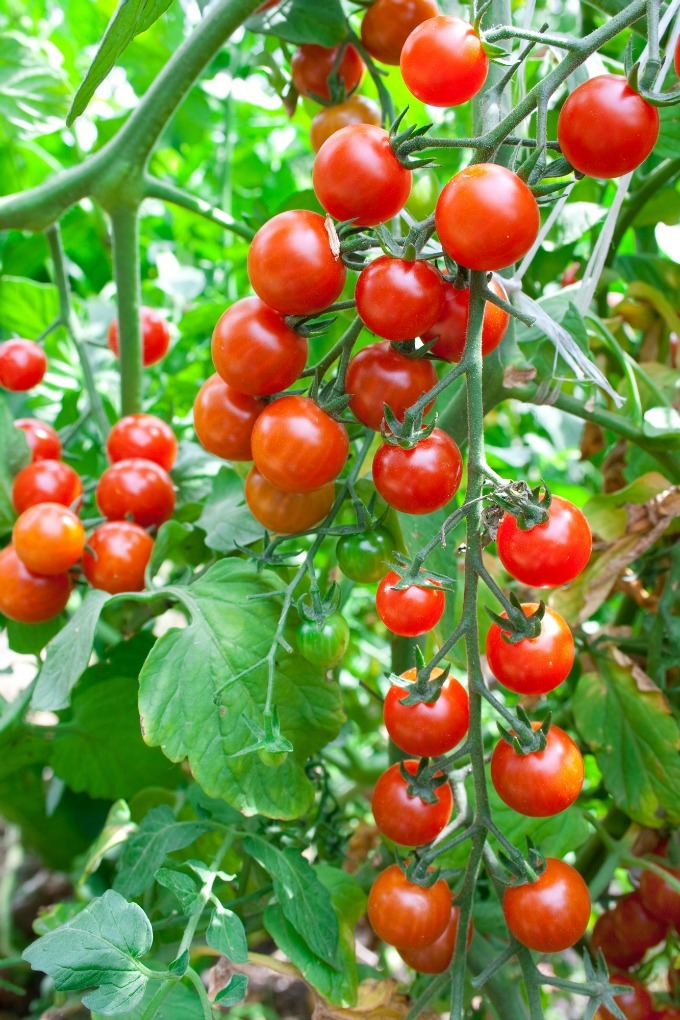
Picking tomatoes off the ground means bending, crouching, and searching through tangled vines. Nobody enjoys that after a long day. Trellised plants put fruit right at eye level, and harvesting turns into a five-minute task instead of a chore.

Pests find easy meals in a sprawling tomato patch too. Slugs and hornworms hide in the shade of leaves touching the dirt. Lifting plants off the ground removes that hiding spot and cuts down on chewed leaves and fruit.
Muddy, dusty tomatoes need a good scrub before you eat them. Trellised fruit stays clean since it never touches soil. Less cleanup means more time actually enjoying your harvest.
Space matters in a raised bed, and growing up beats growing out every time. Vertical growth packs more plants into a small footprint. You’ll harvest more tomatoes per square foot without cramming your bed full of sprawling vines.
Frequently Asked Questions
How tall should a tomato trellis be in a raised bed?
Determinate tomatoes stay compact, so a short trellis around 3 to 4 feet works fine. Indeterminate varieties keep growing until frost hits, and they need 5 to 6 feet of support. Check your seed packet if you’re not sure which type you planted.
Do all tomato plants need trellising?
Yes, even bushy determinate types benefit from some support. Heavy fruit clusters can topple a plant regardless of size. Skipping support risks broken stems and fruit rotting on the ground.
What’s the cheapest DIY trellis option?
Recycled pallets win this category by a landslide. Wooden stakes come in a close second if you already own a hammer. Both options beat flimsy store-bought cages in durability and price.
Can I reuse my trellis next season?
Metal panels, T-posts, and wooden archways last for years with basic care. Wash cloth ties and store everything dry over winter. Wood stakes hold up best when kept out of soggy soil between seasons.
Do tomatoes climb trellises on their own?
No, tomatoes lack the tendrils that cucumbers use to grip and climb. You’ll need ties, clips, or bungee cords to guide the stems upward. Check your plants weekly and add support as new growth appears.
Final Thoughts
Five solid trellis options now sit in your toolkit, from bungee-cord panels to charming pallet designs. Pick whichever one matches your budget, your space, and how much time you want to spend tying up vines.
Raised beds make every single one of these setups easier thanks to loose soil and built-in structure.