How to Edge a Lawn with Bricks for A Clean Garden Border

Grass doesn’t respect boundaries. Give it a few inches of loose soil next to a flower bed, and it’ll creep in. By the end of the season, it’s halfway across your mulch. Brick edging puts a stop to that.
It’s one of the few lawn upgrades that looks better with age instead of worse. Once it’s in the ground correctly, it keeps doing its job for decades with almost no upkeep.
I’ll walk you through everything you need to lay brick edging that actually stays put, whether you want a quick weekend fix or a proper permanent border.
It’s a project most homeowners can tackle themselves in a day or two. You don’t need masonry experience. You do need a little patience and the right base underneath those bricks. That base is where most DIY edging jobs actually go wrong.
Why Bother Edging With Brick At All?
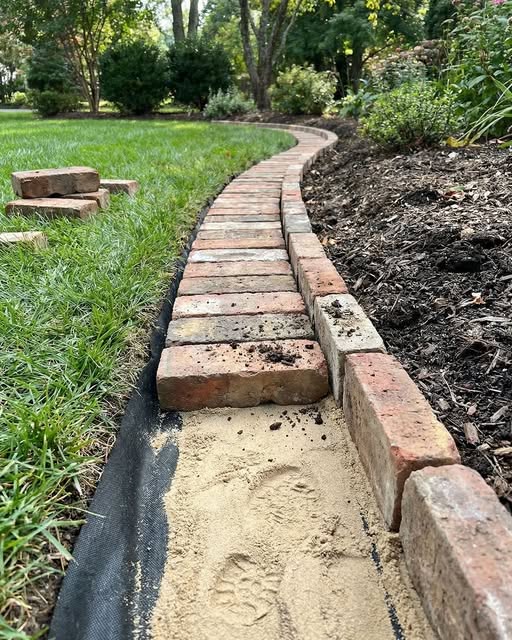
Plenty of materials will separate a lawn from a garden bed. Plastic strips are cheap. Metal edging is fast to install. So why go through the extra work of bricks?
A few reasons keep brick at the top of my list for anyone who wants something that lasts:
- It’s genuinely durable. Brick shrugs off freeze-thaw cycles, lawn mowers, and years of foot traffic in a way plastic edging just can’t.
- It ages well. Most edging materials look worse every year. Brick tends to look better. It picks up a weathered patina that suits an established garden.
- It gives your mower a track to follow. Set it flush with the soil, and you can run a mower wheel right along the border. That alone cuts down dramatically on string-trimming.
- It holds a line, literally. Once bricks are set, they don’t bow, sag, or heave out of the ground the way flexible edging often does after a few winters.
The tradeoff is effort. Brick edging takes more time to install than a roll of plastic border you unspool along a trench. But you’re really only paying that cost once. Once it’s in, it’s in.
Mortar-Set or Sand-Set? Pick Your Method First
Before you buy a single brick, decide how you want to set them. That choice changes your whole materials list and how much work is ahead of you.
Sand-set (also called dry-laid) edging rests on a compacted base of gravel and sand. The bricks stay put through gravity, tight joints, and polymeric sand swept into the gaps.
It’s the method professional landscapers reach for most often. I like it for the same reason: it’s forgiving. If a brick shifts, or a hard freeze heaves one out of line, you just lift it, fix the base underneath, and reset it. No demolition needed.
Mortar-set edging beds the bricks in a cement mortar mix, essentially gluing them into one rigid unit. It goes down faster, since there’s no gravel base to compact.
It also holds tighter joints and gives you a more formal, finished look. The catch is permanence. If a mortared brick cracks, or a section heaves in a hard freeze, you’re chiseling it out and remortaring. You can’t just tap it back into place.
Neither method is wrong. Here’s the honest breakdown:
- Go sand-set if: you live somewhere with real winters, want an edge you can repair or adjust later, or you’re working a long, curved run where flexibility matters.
- Go mortar-set if: you want a faster afternoon project, you’re in a mild climate with little frost heave, or you like the tighter, more formal look of mortared joints.
I’ll focus mainly on the sand-set method here, since it holds up best for most yards over time. I’ll flag where mortar-set differs along the way.
How Many Bricks Do You Actually Need?
Before you head to the landscaping supply yard, figure out your brick count. You don’t want to make a second trip.
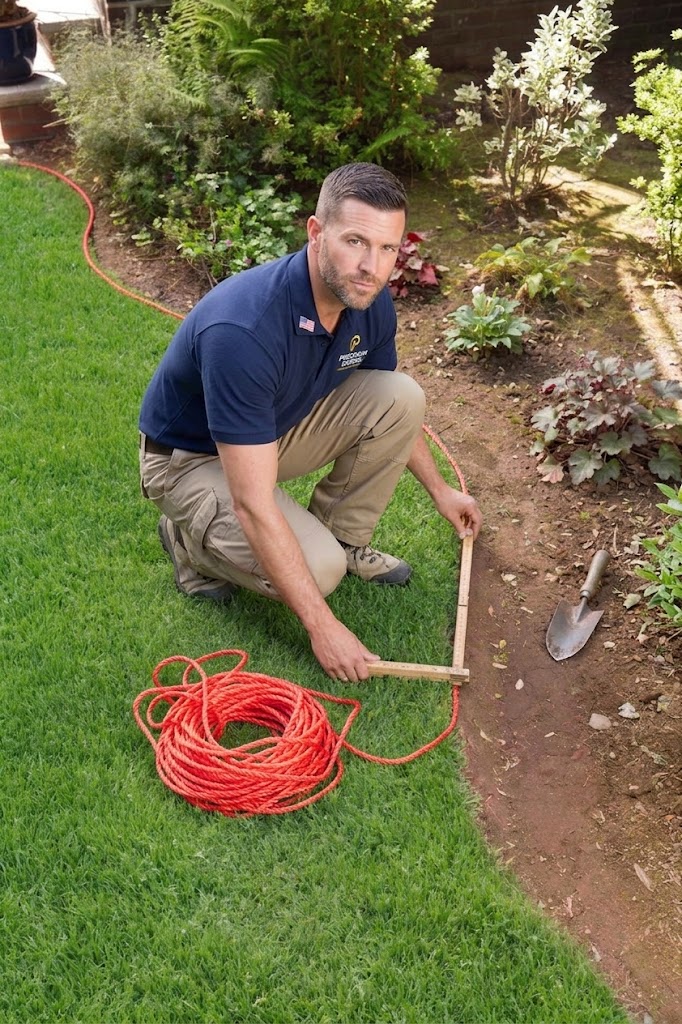
- Lay a piece of rope or garden hose along the edge you want to border, following any curves.
- Mark where it ends, pull it straight, and measure the total length in inches.
- Divide that number by the width of the brick you’re using. Standard bricks run about 4 inches wide.
- Add 10% to that total to cover cuts, breakage, and mistakes.
Here’s how the math plays out.
Say you’ve got a 30-foot bed edge, or 360 inches, and you’re using standard 4-inch-wide bricks. 360 divided by 4 is 90 bricks. Add 10%, and you land around 99. Round up to 100 and call it done.
Note: You can use our garden edging calculator for an estimated idea about cost and materials breakdown.
While you’re at it, don’t grab just any brick from the clearance pile. Look for pavers rated for outdoor exposure and freeze-thaw resistance.
Suppliers often label these “SW,” for severe weathering. Standard building brick wasn’t made for ground contact. It can crack, flake, and crumble within a couple of winters.
What You’ll Need
Here’s what I’d have on hand before starting, assuming you’re going the sand-set route:
Materials:
- Bricks (clay pavers rated for severe weathering)
- Crushed gravel or paver base material
- Coarse sand or paver sand
- Polymeric sand for the joints
Tools:
- Spade or flat-edge shovel
- Rope or garden hose, for marking the line
- Tape measure
- Hand tamper (or a rented plate compactor for longer runs)
- Wheelbarrow
- Screed board (or a straight length of scrap wood)
- Rubber mallet
- Level
- Stiff broom
- Garden hose with a spray nozzle
Note: If you’ve decided on mortar-set instead, swap the gravel, sand, and polymeric sand for a bag of general-purpose mortar mix, a mixing trowel, and a mixing board or tub. You can skip the landscape fabric with this method, since a mortared joint doesn’t leave weeds much of an opening anyway. You’ll still want the rubber mallet and level. Everything else in your kit stays the same.
Step-by-Step: How to Edge a Lawn with Bricks
1. Mark Your Line
Lay your rope or hose along the edge you’re bordering, following any curves you want to keep. Step back and look at it before you commit.
This is the easiest point to adjust the shape, so take a minute here. Once bricks are in the ground, changing your mind gets a lot more expensive.
2. Dig the Trench
Cut along your marked line with a spade, then dig out a trench a few inches wider than your bricks. You want room to work, not just room for the brick itself.
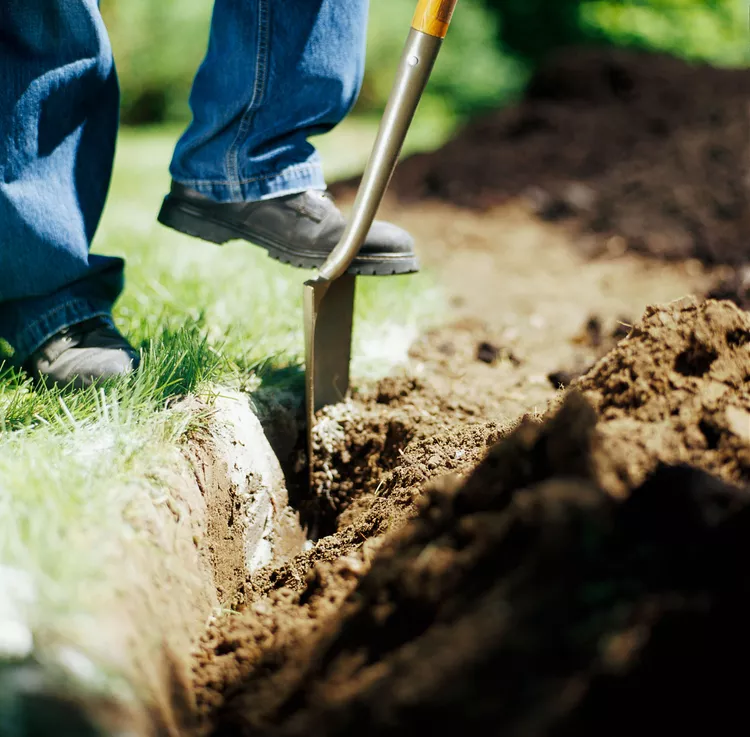
Depth matters more than most people expect. Dig until the soil changes color. That shift usually marks the line between topsoil and the subsoil underneath.
Topsoil holds organic material that shifts with moisture and temperature, so building your base in it is asking for trouble down the road. You want your trench bottom sitting in that more stable subsoil.
As a rough target, aim for a trench about 6 inches deep. That gives you room for 2 to 3 inches of gravel base, about an inch of sand, and the brick itself sitting flush with the surrounding grade.
3. Pack the Base
Wheelbarrow your gravel or paver base over to the trench and spread it in a layer 2 to 3 inches deep. Tamp it down firmly with your hand tamper, working in small sections rather than trying to compact the whole trench at once.
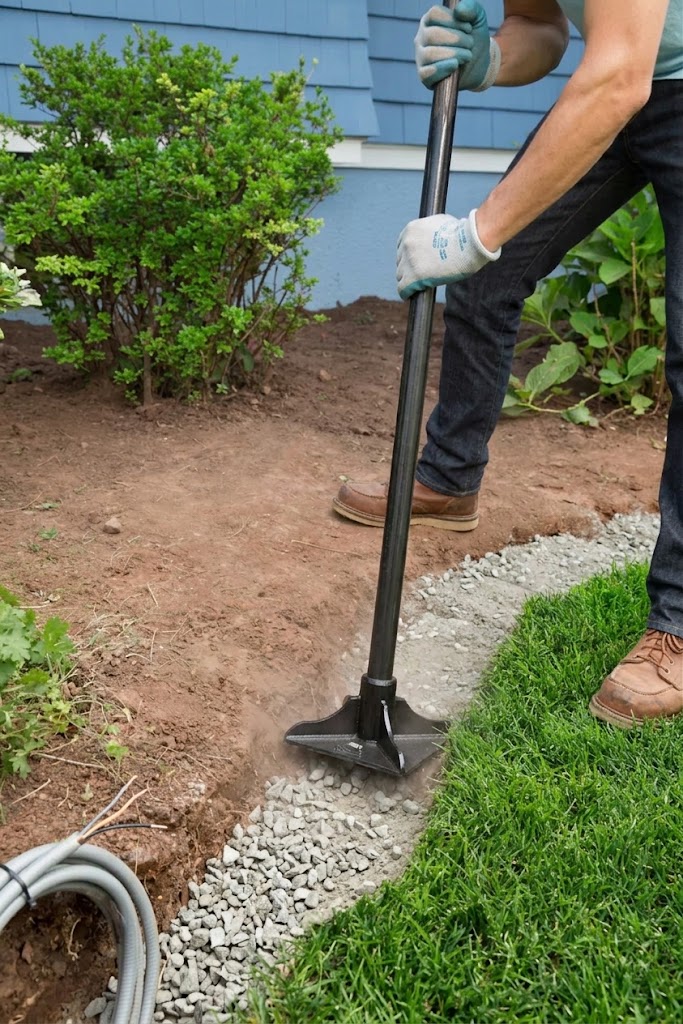
This step gets skipped more than any other in DIY edging jobs, and it’s the one that decides whether your border still looks straight in three years or has started to wander.
A compacted base keeps bricks from settling unevenly after a few good rainstorms.
5. Add the Sand Layer
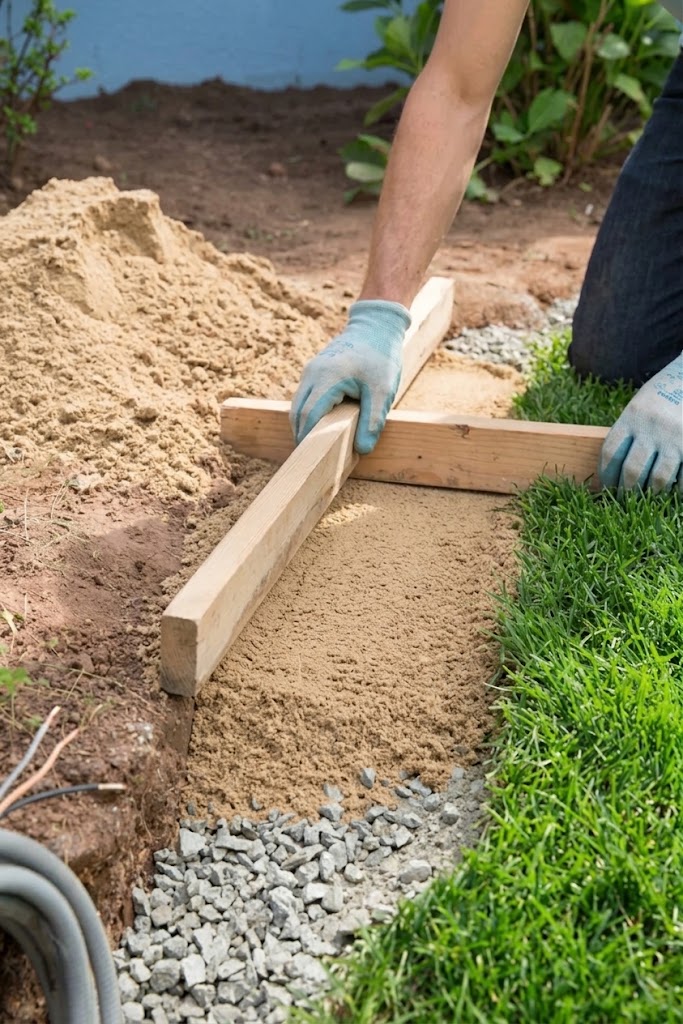
Spread about an inch of coarse sand over the paver base. Use your screed board, or even a straight piece of scrap wood, to level it off. This layer is what your bricks actually rest on, so take the extra few minutes to get it flat.
6. Set the Bricks
Now for the part that actually feels like progress. Working in short sections, a few feet at a time, press each brick into the sand.
Tap it down gently with the rubber mallet until it sits flush with the ground on both sides.
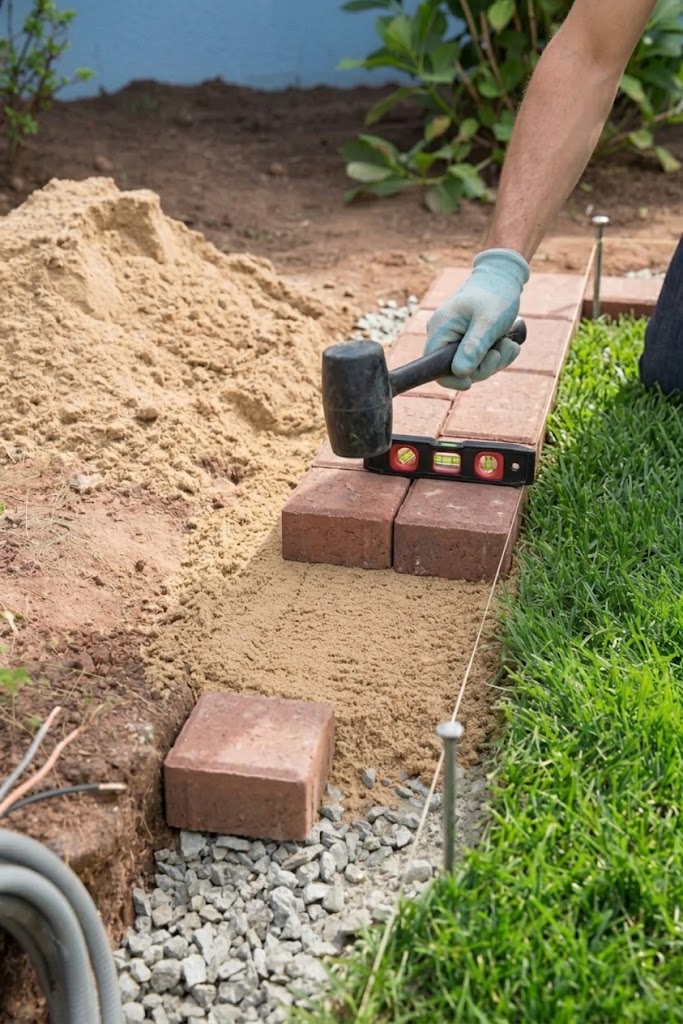
Check your level often, not just once at the start. Small dips add up fast if you’re not watching for them. Keep each brick snug against its neighbor, following your marked line as you go.
Note: If you’re mortar-setting instead, this step changes a bit. You’ll spread a bed of mortar directly into the trench, section by section, and press the bricks into that instead of sand. Everything else about the tapping and leveling stays the same.
7. Backfill and Fill the Joints
Once your bricks are in place, rake soil up against the back edge to hold everything snug. Then pour polymeric sand over the top of the bricks and sweep it into the joints with your broom.
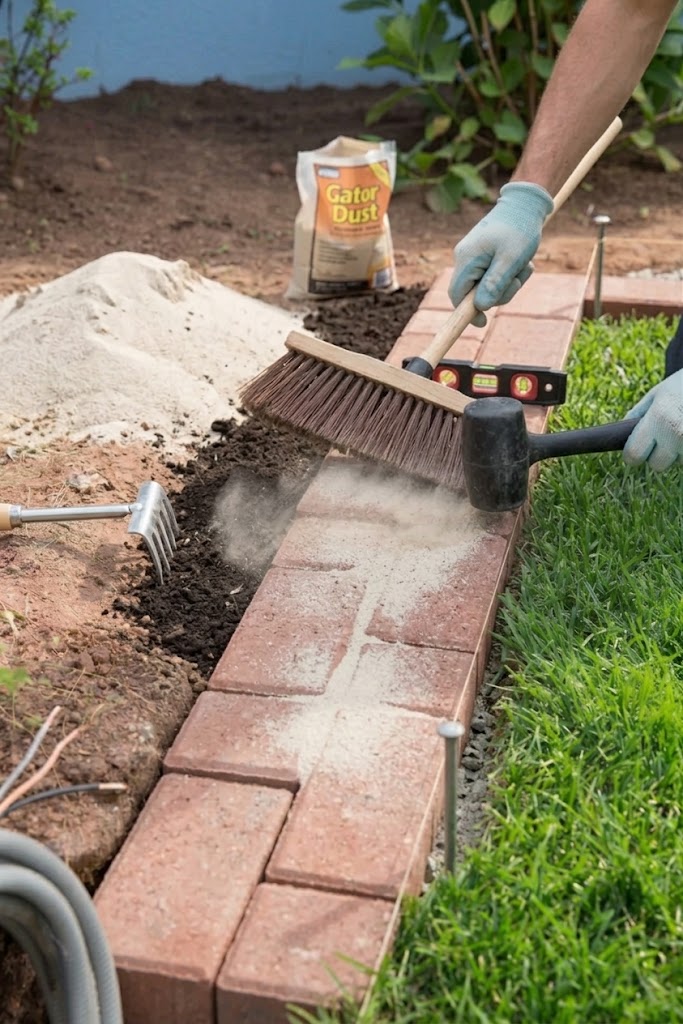
Tap the bricks lightly with the mallet as you go. This helps the sand settle deep into the gaps instead of just sitting on top.
Keep sweeping and tapping until the joints are packed and the sand sits flush with the brick faces.
8. Set It With Water
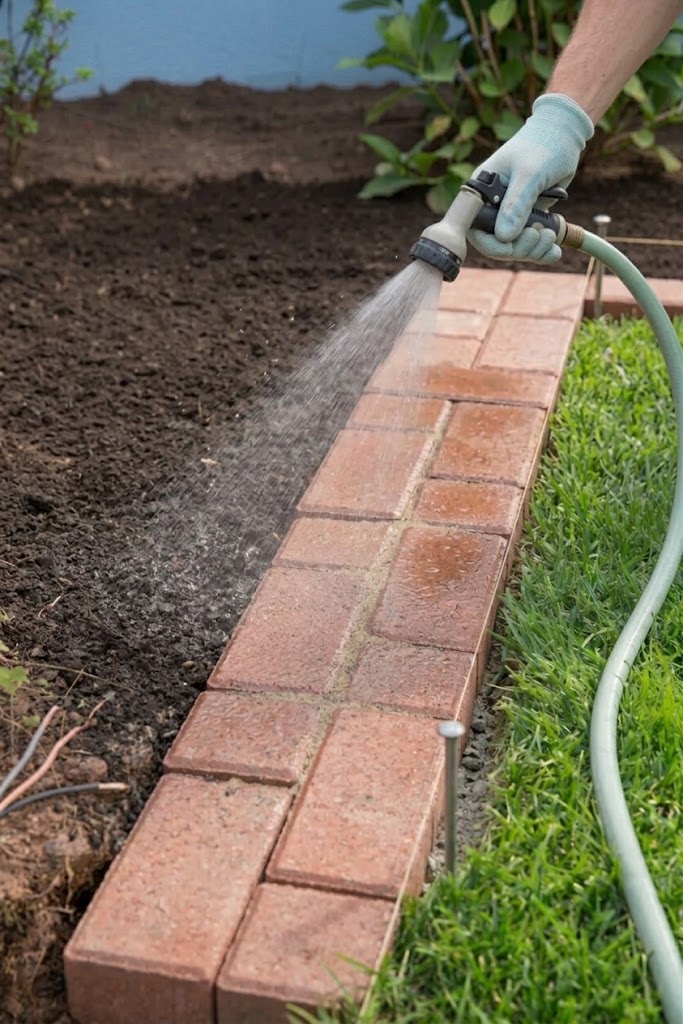
Lightly mist the edging with your hose. Don’t blast it. You’re trying to dampen the sand enough to activate the polymeric binder, not wash it out of the joints.
As it dries, that sand hardens and locks the bricks together, almost like grout.
Give it a couple of days before you walk on it or run a mower over it. If it’s mortar-set, hold off even longer, closer to a week, so the mortar has time to properly cure.
Tips for Curves and Corners
Straight runs are simple. Curves take a bit more finesse, but nothing you can’t handle.
- On gentle curves, you can usually fan your bricks slightly, widening the gap on the outer edge of the curve just a touch. Keep those gaps consistent so the joint sand fills evenly later.
- On tighter curves, a straight brick won’t follow the arc cleanly. You’ll end up with a wedge-shaped gap at the curve’s peak. Rather than force it, cut a brick to fill that triangular space. Mark the cut lines with a pencil, then use a circular saw fitted with a diamond blade to score and cut. A steady trickle of water over the blade keeps the dust down.
- For corners, miter your bricks at an angle where the two lines meet, or use a single larger corner brick if your supplier carries one. Either way, dry-fit the pieces before you commit them to the base, so you’re not discovering a bad fit after the mortar or sand is already down.
How to Keep Your Brick Edging Looking Good
Once it’s in, brick edging asks very little of you. But a little seasonal attention keeps it looking sharp for years instead of just looking okay.
Top off the joint sand. Polymeric sand settles over time, especially after heavy rain or a hard winter. Once a year, check the joints. If you see gaps opening up, sweep in fresh sand and mist it again to reactivate the binder.
Reset bricks that shift. Even a well-built base can move a little after a rough freeze-thaw cycle. If you spot a brick that’s popped up or sunk, don’t ignore it. Lift it out, adjust the sand underneath, and set it back flush. Left alone, one loose brick tends to knock its neighbors out of line too.
Keep grass from creeping over the top. Brick edging cuts down on trimming, but it won’t eliminate it completely. A quick pass with a string trimmer along the inside edge once or twice a season keeps things crisp.
Watch for weeds in the joints. Sand-filled joints are pretty resistant to weeds, but not immune. If you notice seedlings poking through, pull them while they’re small. Established roots get a lot harder to remove once they’ve worked into the base.
Rinse it off now and then. A quick hose-down a few times a year keeps mineral deposits, algae, and general grime from building up, especially in shadier spots where bricks stay damp longer.
Common Mistakes to Avoid
I’ve seen, and made, most of these mistakes myself over the years. A few are worth calling out specifically, because they’re the difference between edging that lasts and edging you’re redoing in two years.
- Skipping the base layer. This is the big one. Bricks set directly on soil, with no gravel or sand underneath, will shift, sink, and heave. There’s no shortcut around a proper base if you want the edging to last.
- Digging in topsoil instead of subsoil. Organic topsoil moves with moisture and temperature. If your trench bottom is sitting in it, expect uneven settling down the road.
- Using the wrong brick. Regular building brick isn’t rated for ground contact or freeze-thaw exposure. It looks fine the first year, then starts flaking and crumbling. Spend the extra dollar or two per brick on pavers actually rated for outdoor use.
- Setting bricks too high or too low. Too high, and your mower catches on them every pass. Too low, and grass creeps right over the top, defeating the whole point. Flush with the surrounding grade is almost always the right call.
- Rushing the joint sand. Sweeping polymeric sand into joints and skipping the water activation step means it never locks in place. The first heavy rain washes it right back out.
- Ignoring the weather forecast. Polymeric sand needs a dry window to set properly. Lay it right before a rainstorm, and you’ll end up with a hazy, stained mess on the brick faces instead of clean joints.
A Border Worth the Weekend
Brick edging isn’t the fastest lawn project you’ll ever tackle, but it’s one of the few that actually gets better with time instead of needing constant upkeep.
Get the base right, take your time setting the bricks, and you’ll have a clean, defined line between your lawn and your beds that’ll outlast just about anything else you could put in that trench.
Give it a weekend. Your mower will thank you every single time you run it past that edge.