
How to Repot Houseplants: A Complete Step-by-Step Guide for Beginners

Picture this: your beloved pothos has been sitting in the same pot for two years. The leaves look dull, the soil dries out within a day of watering, and there are roots poking out of the drainage holes like it’s trying to escape.
Sound familiar? If so, it’s time to learn how to repot houseplants — and it’s easier than you think.
I remember the first time I tried to repot a plant. I was terrified I’d kill it. I yanked the pot, soil went everywhere, and I stood there holding a root ball with no idea what to do next.
But you know what? The plant survived. It thrived. Within a few weeks, it had fresh new leaves and a whole new energy about it.
This guide will walk you through everything you need to know about repotting houseplants: why it matters, how to know when it’s time, what supplies to use, and a clear step-by-step process.
We’ll also cover the most common mistakes and how to care for your plant once it’s settled into its new home.
Why Repotting Matters
You might be wondering: does my plant really need a new pot? Can’t it just stay where it is? The short answer is no — not forever.
Here’s why repotting is one of the most important things you can do for your houseplants.
Roots Need Space
Think of your plant’s roots like the foundation of a house. If the foundation is cramped, the whole structure suffers.
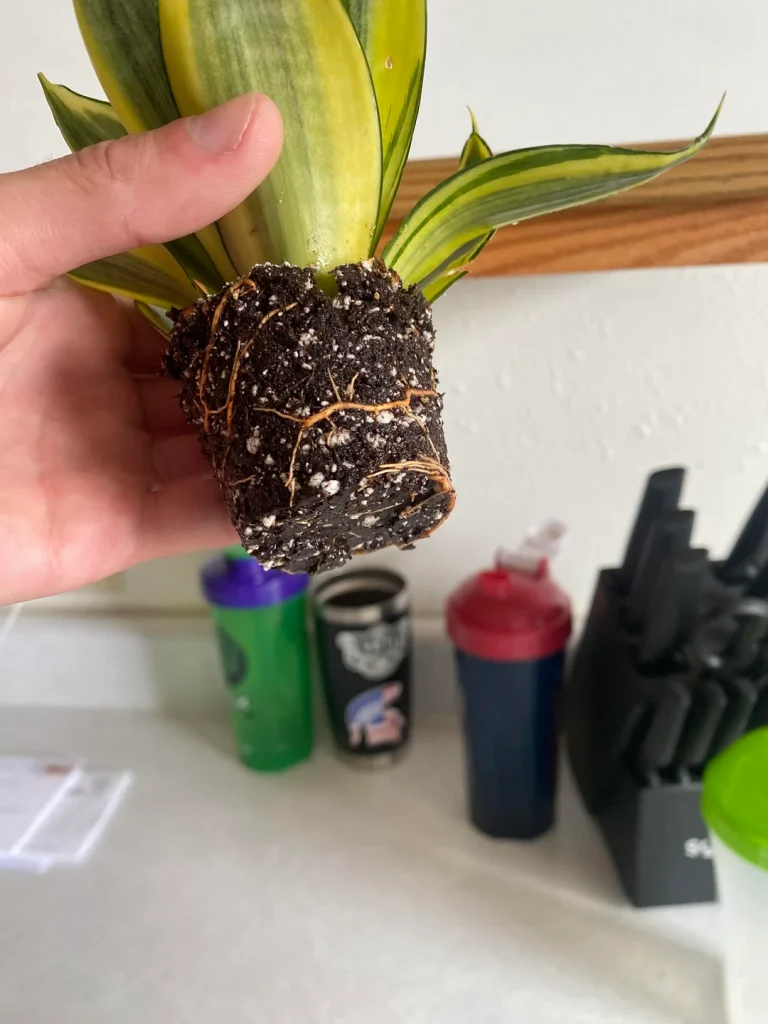
Roots absorb water and nutrients from the soil, and when they run out of room to grow, they start circling around the inside of the pot. This condition is called being root-bound.
A root-bound plant can’t absorb what it needs, no matter how much you water or fertilize it. You might notice slow growth, wilting between waterings, or leaves that look pale and tired.
All of these are signs that your plant is working overtime with not enough space to do it.
Fresh Soil Boosts Growth
Over time, potting soil breaks down. The nutrients get used up, the structure compacts, and it stops draining properly. Even the best potting mix becomes depleted after 12 to 18 months.
When you repot, you’re not just giving your plant more space — you’re giving it a nutritional reset.
Fresh soil improves water uptake, allows air to reach the roots, and delivers a slow release of nutrients.
Many plant owners are amazed at how quickly their houseplants perk up after a repot. New leaves, brighter colour, better posture — it’s like watching a plant wake up from a long nap.
Propagation Opportunity
Repotting season is a fantastic time to multiply your plant collection — for free. Many houseplants, like pothos, spider plants, peace lilies, and snake plants, can be divided during repotting.
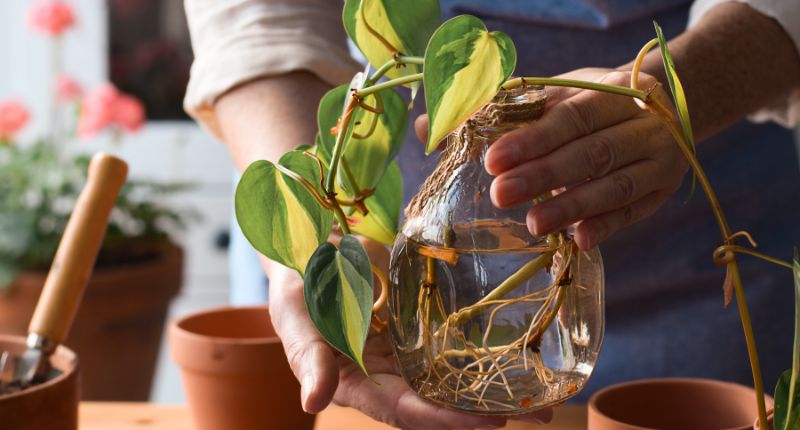
When you remove the plant from its pot, you’ll often find natural divisions in the root ball. Gently separate these sections and pot them individually.
Suddenly you have two plants instead of one. It’s one of the most satisfying parts of plant care, and a great way to share plants with friends.
Read more: How to Propagate Pothos in Water Step by Step
Disease and Pest Prevention
When was the last time you looked at your plant’s roots? Most people never do — until something goes wrong. Repotting gives you a chance to inspect the roots closely for signs of trouble.
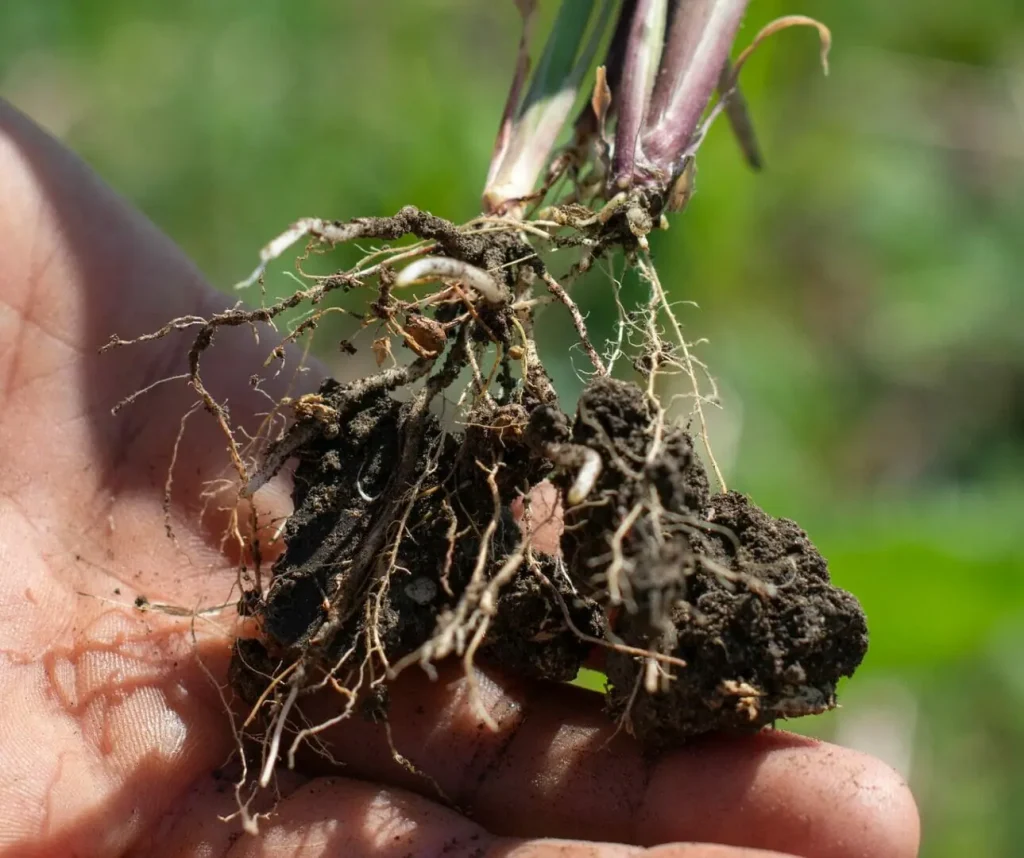
Look for root rot (mushy, dark, foul-smelling roots), fungus gnats (tiny larvae in the soil), or fungal infections.
Catching these problems early can save your plant. You can trim away damaged roots with clean scissors and repot into fresh, clean soil to give the plant a fighting chance.
Better Water Absorption
Have you ever watered a plant and watched the water rush straight through the pot and out the drainage hole — without being absorbed at all?
That’s a sign the soil is compacted or hydrophobic (water-repelling), which happens in old, broken-down potting mix.
Fresh soil absorbs and retains moisture in a balanced way. It holds enough water for the roots to drink while still draining the excess.
If your plant seems perpetually thirsty despite regular watering, a repot might be exactly what it needs.
Signs Your Plant Needs Repotting
Not sure if it’s time? Here are the telltale signs that your plant is crying out for a new home:
Visible Roots
This is the most obvious sign.
If you can see roots poking out of the drainage holes at the bottom of the pot, or pushing up above the soil surface, your plant has run out of room.
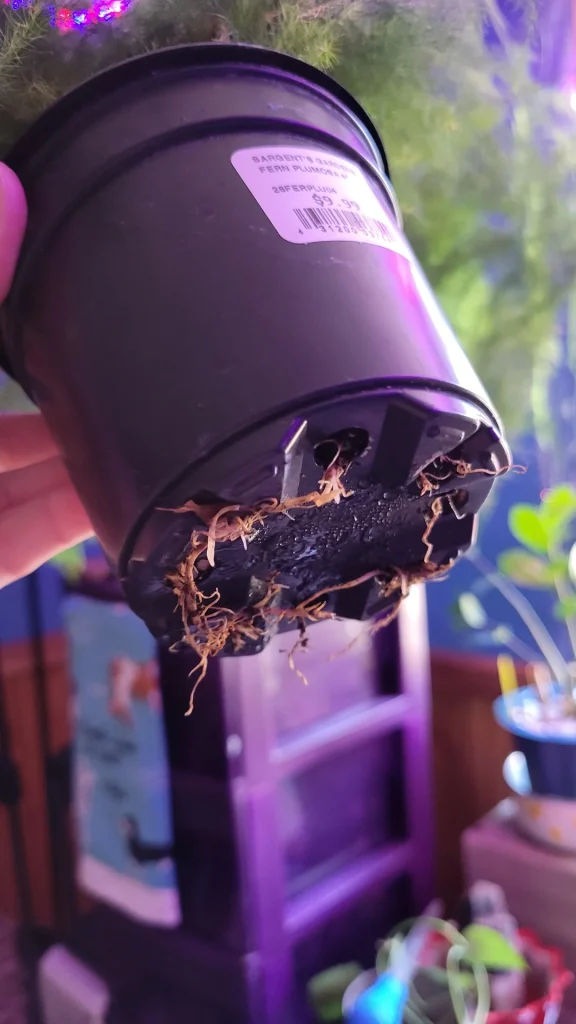
It’s not just uncomfortable — it’s actively limiting the plant’s health.
Root-Bound Condition
Gently slide the plant out of its pot. If the roots are completely circling the inside, forming a tight spiral, or if there’s more root than soil visible, the plant is root-bound.
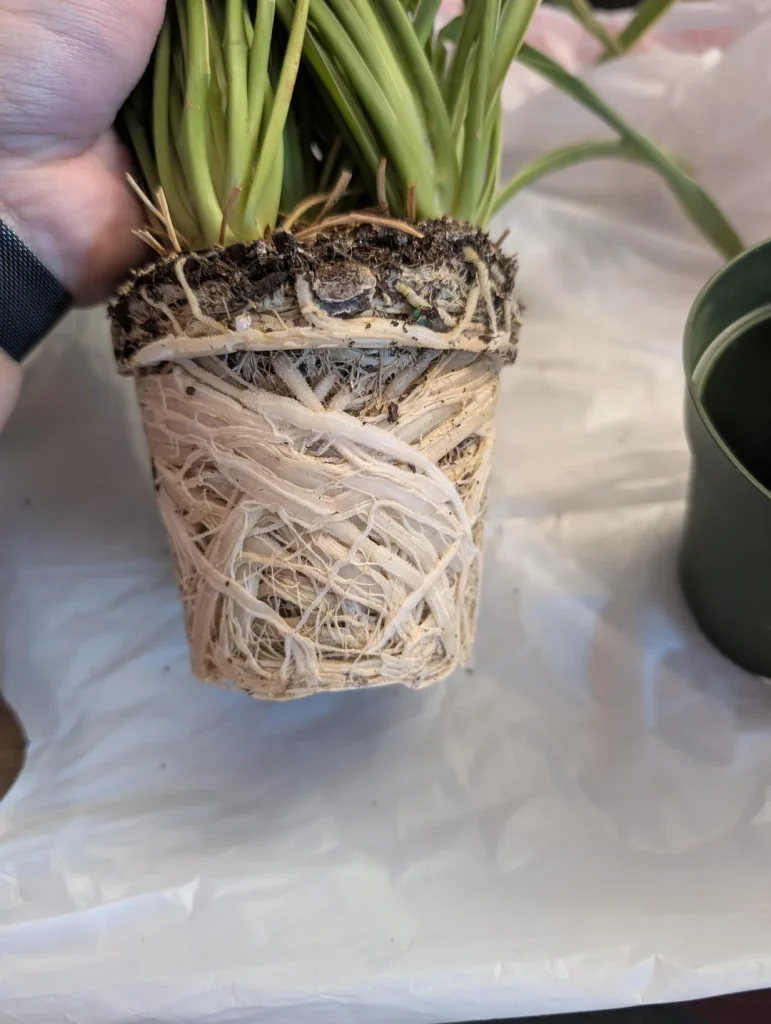
The soil may feel like a solid block because the roots have taken over every bit of space.
Soil Dries Out Rapidly
If you’re watering your plant every other day and it’s still wilting, the problem isn’t your watering schedule.
A root-bound plant displaces so much soil that there’s barely any left to hold moisture. Water passes straight through without being absorbed properly.
Slow or Stunted Growth
During the growing season (spring and summer), most houseplants produce new leaves regularly.
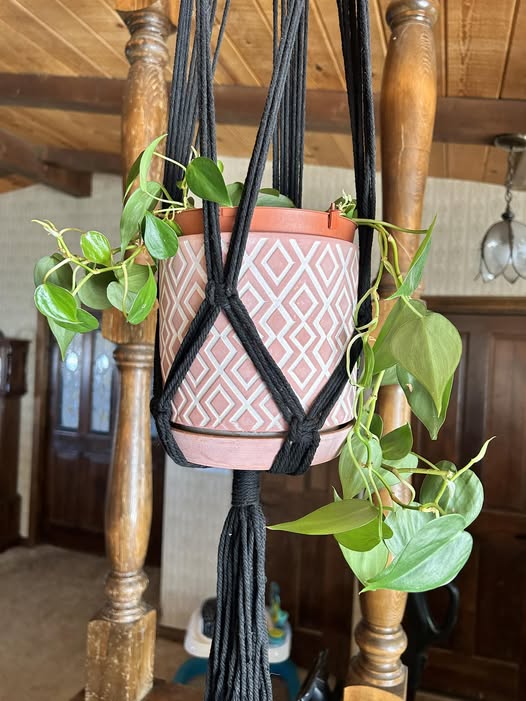
If yours hasn’t grown much in months, and you’re giving it adequate light, water, and nutrients, it may simply need more room for its roots to expand.
No New Leaves or Flowers
A plant that seems stuck — no new growth, no blooms, just… sitting there is often signalling that it’s root-bound. Energy that should go towards new growth is being diverted just to survive in an overcrowded space.
Quick Tip
The best time to check if your plant needs repotting is in early spring, just before the growing season begins. This gives the plant maximum time to settle into its new home and take advantage of the warmer, longer days ahead.
Choosing the Right Pot and Soil
Before you repot, you need the right materials. Getting this step right makes a huge difference to your plant’s long-term health.
Picking the Correct Pot Size
This is where many plant owners go wrong. It’s tempting to put a small plant into a huge pot, thinking it’ll have plenty of room to grow.
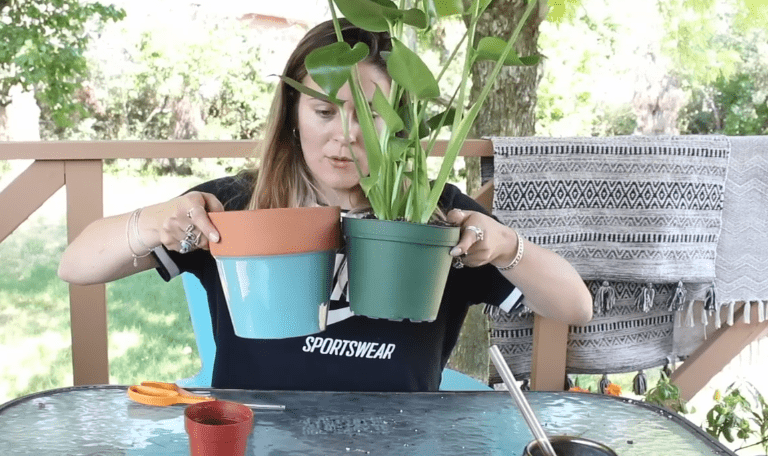
But too much extra space causes problems. Excess soil around the roots holds water that the plant can’t absorb, which leads to root rot.
The golden rule: increase the pot diameter by 1–2 inches only. So if your plant is currently in a 4-inch pot, move it to a 5 or 6-inch pot. If it’s in a 10-inch pot, go to a 12-inch pot. Here’s a quick reference guide:
| Current Pot Size | New Pot Size | Plant Type | Notes |
| 4 inches | 5–6 inches | Small herbs, succulents | Increase by 1–2″ |
| 6 inches | 7–8 inches | Pothos, small ferns | Check roots first |
| 8–10 inches | 10–12 inches | Peace lily, snake plant | Great for division |
| 12+ inches | 14–16 inches | Fiddle leaf, palms | May need two people |
Drainage Matters
No matter how beautiful a pot looks, it needs drainage holes. Without them, water collects at the bottom and creates the perfect conditions for root rot.
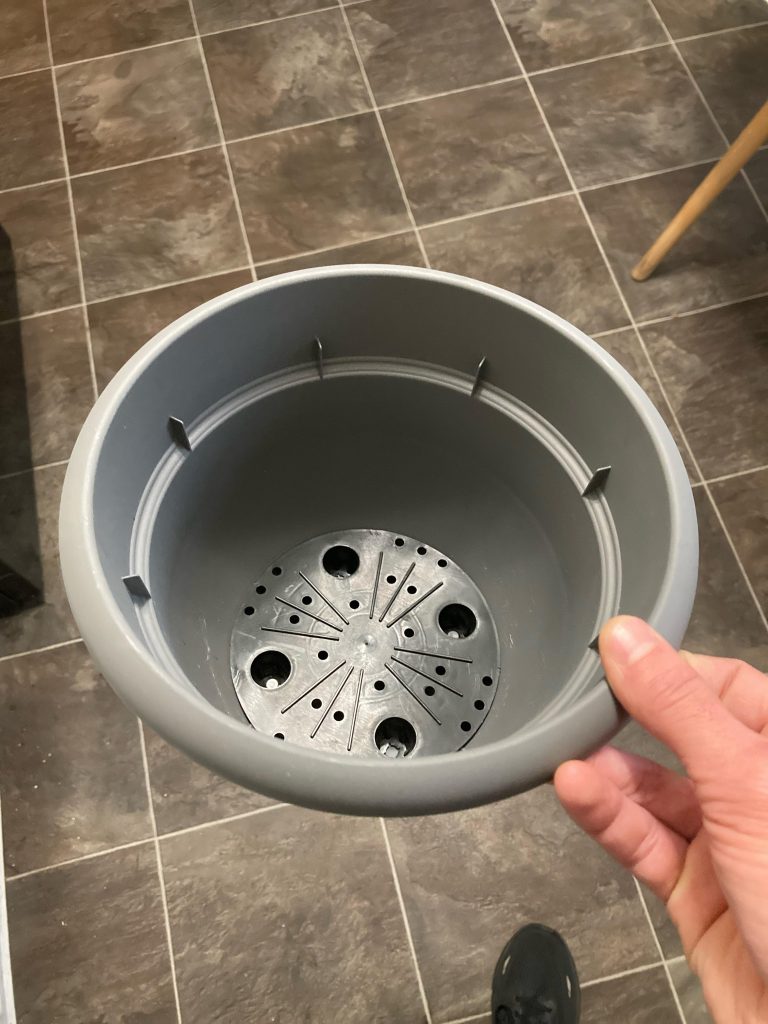
If you fall in love with a decorative pot that doesn’t have holes, use it as a cachepot — place your plant in a plain nursery pot with holes, then set it inside the decorative one.
Just remember to remove the inner pot when watering and let it drain fully before putting it back.
Selecting Potting Soil
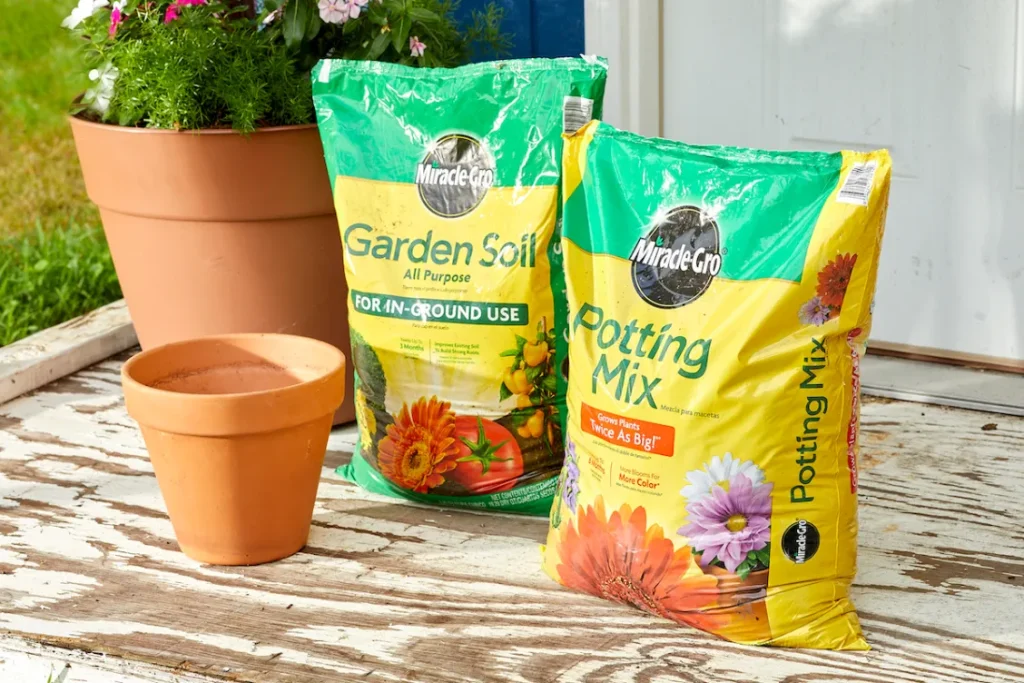
Always use fresh, high-quality potting mix — not garden soil. Garden soil is too dense for containers, compacts easily, and can introduce pests and diseases. A good potting mix is light, airy, and free-draining.
Different plants have different soil preferences. Here’s a quick guide:
| Plant Type | Recommended Mix | Why It Works |
| Succulents & Cacti | Potting mix + 50% perlite or coarse sand | Fast drainage prevents root rot |
| Tropical foliage | Peat-free potting mix + perlite (20%) | Moisture retention with drainage |
| Ferns & moisture lovers | Potting mix + coconut coir | Holds moisture without waterlogging |
| Orchids | Orchid bark / specialized mix | Excellent aeration for aerial roots |
Look for peat-free potting mixes when possible — they’re more sustainable and work just as well for most houseplants.
Decorative Pot Tips
If aesthetics matter to you (and they absolutely should — your home deserves beautiful plants!), consider using a double-pot system.
Place your plant in a functional nursery pot with drainage, then slip it inside a stylish outer pot. This gives you full design flexibility without compromising on plant health.
Step-by-Step Repotting Process
Ready to get your hands dirty? Follow these steps and you’ll have a beautifully repotted plant in under 30 minutes.
Step 1 – Preparation
Water your plant lightly 1–2 hours before repotting. Moist soil holds together better than dry soil, making it easier to remove the plant without damaging the roots. Avoid watering it so much that the soil is soggy.
Gather your supplies before you start. You’ll need:
- A new pot (1–2 inches larger in diameter)
- Fresh potting mix appropriate for your plant
- Clean scissors or pruning shears
- A small hand fork or chopstick (for loosening roots)
- Newspaper or a tray to catch mess
- Watering can
Step 2 – Removing the Plant
Lay the pot on its side and gently squeeze the sides if it’s plastic, or run a knife around the inside edge if it’s ceramic. This helps loosen the soil from the pot walls.
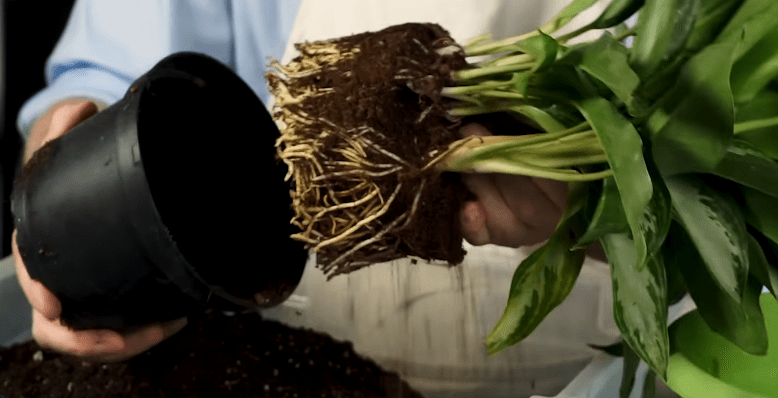
Support the base of the plant with one hand and tip the pot with the other. The plant should slide out gently. If it’s stuck, resist the urge to yank. Give it another gentle squeeze or try tapping the bottom of the pot.
Once the root ball is free, take a good look at it. Are the roots tightly bound? Is there any sign of rot or pests? This inspection is part of the process.
Step 3 – Pruning and Root Care
Now is the time to give the roots some attention. Use your fingers or a hand fork to gently loosen the outer roots — especially if they’ve been tightly circling the pot.
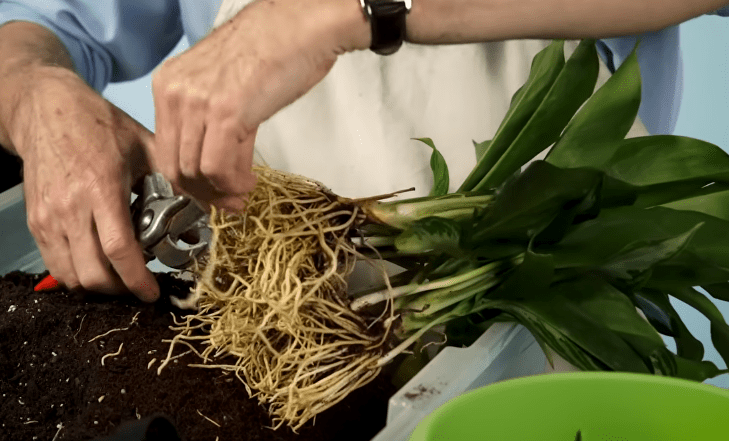
This encourages them to spread out into the new soil rather than continuing to circle.
If the root ball is very dense, trim up to one-third of the root mass with clean, sharp scissors.
This sounds drastic, but it stimulates new, healthy root growth. Remove any roots that are dark, mushy, or smell bad — these are rotted and need to go.
If you’d like to propagate, now is the moment to gently divide the plant. Look for natural separation points and pull sections apart with your hands, or use scissors for tougher roots.
Step 4 – Placing the Plant in Its New Pot
Add a layer of fresh potting mix to the bottom of the new pot. How deep this layer is depends on the plant — you want the top of the root ball to sit about 1–2 inches below the rim of the pot, leaving room for watering.
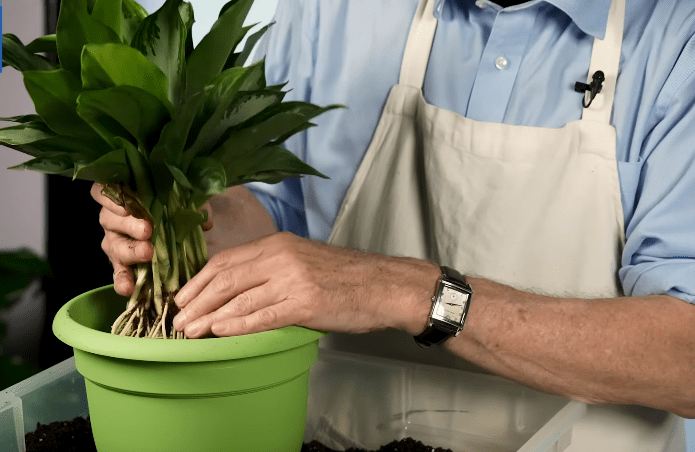
Place the plant in the centre of the pot. Hold it upright and begin filling in around the sides with fresh potting mix. Work the soil in gently with your fingers, making sure there are no large air pockets.
Once filled, pat the soil down lightly — not too firmly. You want it stable but not compacted. The soil should feel settled, not solid.
Step 5 – Watering and Settling
Water the plant thoroughly immediately after repotting. This does two things: it settles the soil around the roots, and it helps the plant begin adjusting to its new environment. Water slowly and evenly until it flows from the drainage holes.
You may notice the soil sinks slightly after watering. That’s normal — just top it up with a little more potting mix if needed.
For the first few weeks, avoid overwatering. The plant’s roots haven’t fully established yet, and soggy soil at this stage can cause stress.
Step 6 – Aftercare
The job doesn’t end when you put the pot down. The first few weeks after repotting are crucial for the plant’s success.
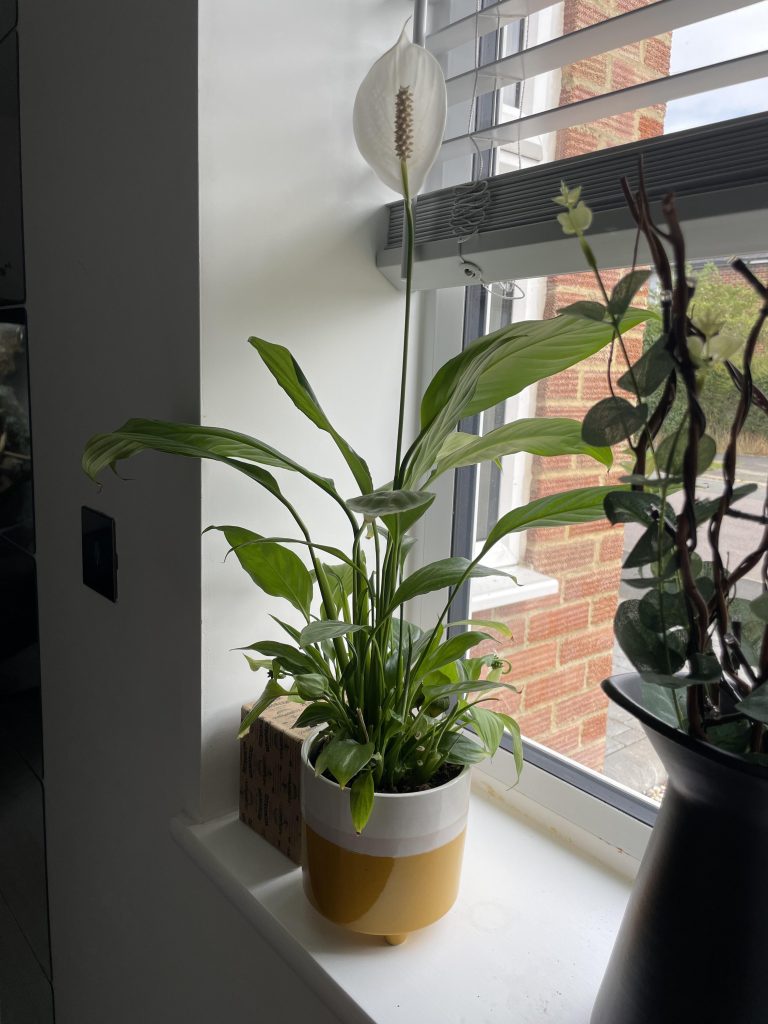
- Place the plant in bright, indirect light — avoid direct sunlight for a few days
- Keep temperatures consistent and avoid cold drafts
- Wait at least 4–6 weeks before fertilizing — the fresh soil has enough nutrients for now
- Watch for signs of repotting stress (drooping, yellowing leaves) — this is usually temporary
Common Mistakes to Avoid
Even experienced plant owners make these errors. Being aware of them can save you a lot of heartache.
Going Too Big with the Pot
We’ve touched on this, but it’s worth repeating: bigger isn’t always better. Oversized pots hold too much water around the roots, creating anaerobic conditions that invite root rot. Stick to 1–2 inches larger than the current pot.
Overwatering Right After Repotting
It’s natural to want to give your newly repotted plant lots of water. Resist the urge. The roots need time to adjust and begin absorbing from the new soil.
Water thoroughly once at repotting, then let the soil dry out slightly before watering again.
Skipping Root Pruning for Root-Bound Plants
If your plant is severely root-bound, simply placing it in a bigger pot won’t fully solve the problem.
The roots will continue their old circling pattern unless you loosen and trim them. Take the time to work through the root ball — your plant will thank you.
Using Garden Soil
It’s free, it’s available, and it should not go in your houseplant pots. Garden soil is too heavy for containers, compacts over time, and drains poorly.
It can also contain weed seeds, insects, and pathogens. Always use a purpose-made potting mix.
Repotting in the Wrong Season
Repotting during autumn or winter, when plants are dormant or growing slowly, causes unnecessary stress. Aim for early spring, just as the plant starts showing new growth. This gives it the best possible conditions to recover and thrive.
Aftercare and Maintenance
Getting the repotting right is only half the battle. What you do in the weeks after is just as important.
Adjusting Your Watering Schedule
Fresh potting mix retains moisture differently from the old, compacted soil your plant is used to. You may find you need to water slightly less frequently at first. Use the finger test: push your finger 1–2 inches into the soil. If it feels damp, wait. If it’s dry, water.
Fertilizer Timing
Wait at least 4–6 weeks before adding any fertilizer. Fresh potting mix contains nutrients already, and adding more too soon can burn the delicate new roots. After that waiting period, resume a regular feeding schedule — typically once a month during the growing season.
Monitoring Your Plant
Keep a close eye on your plant for the first 2–3 weeks. Some degree of drooping or leaf yellowing is completely normal — this is called repotting shock, and it’s the plant adjusting to its new environment. In most cases, it resolves within a week or two.
However, watch for these warning signs that something more serious is wrong:
- Severe, prolonged wilting that doesn’t improve
- Leaves turning brown and crispy (underwatering stress)
- Leaves turning yellow and soft (overwatering)
- Foul smell from the soil (possible root rot)
If you spot any of these, don’t panic. Investigate the roots, adjust your watering, and give the plant a little extra time and patience.
Repotting Shock vs Serious Stress
Mild repotting shock looks like temporary wilting, slight leaf yellowing, or a pause in growth. The plant looks a little sad but not desperate. This is normal.
Serious stress looks like dramatic wilting that doesn’t improve after a day or two, widespread yellowing, and soil that is either waterlogged or bone-dry.
If this happens, check the roots for rot and adjust your care routine accordingly. Often, the fix is simple: less water, more patience
Frequently Asked Questions
What is the best season to repot houseplants?
Early spring is ideal. Plants are coming out of dormancy and entering their growing season, which means they’ll recover quickly from any repotting stress. Avoid repotting in winter when most plants are resting.
How big should the new pot be?
Choose a pot that is 1–2 inches larger in diameter than the current one. This gives the roots room to grow without leaving so much extra space that water sits stagnant around them.
Do all houseplants need repotting?
Most do, but not all on the same schedule. Fast growers like pothos and spider plants may need repotting every year. Slow growers like cacti and snake plants might only need it every 2–3 years. Some plants, like peace lilies, actually prefer to be slightly root-bound — they bloom more prolifically when a little cramped.
Should I prune the roots?
Yes, when needed. Loosening the roots is always a good idea. Trimming up to one-third of the root ball is safe for root-bound plants and encourages healthy new growth. Always use clean, sharp scissors to avoid tearing.
Can I divide my plant during repotting?
Absolutely — and it’s a great idea. Many houseplants form natural clumps or produce offsets that can be separated and potted individually. Just make sure each division has a healthy set of roots before potting it up on its own.
Should I water before or after repotting?
Both. Water lightly 1–2 hours before repotting to make the root ball easier to handle. Then water thoroughly immediately after repotting to settle the soil and help the plant adjust to its new home.
How long before I can feed my plant again?
Wait 4–6 weeks. Fresh potting mix contains nutrients, and feeding too soon can overwhelm the roots. After this period, resume your normal fertilizing routine.
Conclusion
Learning how to repot houseplants is one of the most rewarding skills you can develop as a plant parent. It’s not complicated, and it doesn’t need to be scary.
With the right pot, the right soil, and a gentle touch, you’ll give your plants the space and nutrients they need to truly flourish.
Remember the key steps: watch for the signs that it’s time, choose a pot just 1–2 inches larger, use fresh potting mix suited to your plant, handle the roots with care, water thoroughly, and be patient during the adjustment period.