15 Christmas Crafts for Outdoors That Make Your Porch Look Magical

Your front porch can look magical this Christmas, and you don’t need to spend a fortune.
I’ve seen plain boards, old tires, tin cans, and garden rocks turn into showstopping decorations. A little paint and a few free hours do the rest.
Outdoor crafts come with one big challenge. Rain, wind, and cold can wreck a pretty project in a week.
I solved that problem in every idea below, so your decorations stay bright all season.
These 15 Christmas crafts for outdoors range from quick 20-minute wins to relaxed weekend builds. Some cost almost nothing. Some make great family projects.
Every one adds cozy holiday charm to your porch, yard, or fence. Pick your favorite, grab your supplies, and start crafting.
What Makes an Outdoor Christmas Craft Last
I’ve watched plenty of pretty crafts fall apart in one rainy week. These four habits keep yours looking great all season.
- Choose weatherproof materials: Pick wood, metal, plastic, and outdoor fabric. Skip cardboard and plain paper. They turn to mush in the first storm.
- Seal everything: Brush or spray on a clear outdoor sealer. Cover paint, rocks, and wood. Seal both sides so moisture can’t sneak in.
- Anchor against wind: Add bricks, sandbags, or stakes to anything tall. A tipped tower breaks fast. A weighted base stays put.
- Use outdoor-rated lights: Check the package for an outdoor label. Plug them into a GFCI outlet. Choose warm white bulbs for a cozy glow.
Bonus tip: Tuck your best pieces under a porch roof. Even a little cover adds weeks to a craft’s life.
Keep these four rules in mind as you read. You’ll spot them again in every idea below.
15 Christmas Crafts for Outdoors (The Pallet Tree Is My Favorite)
1. Rustic Welcome Plank with an Ornament Door Sign
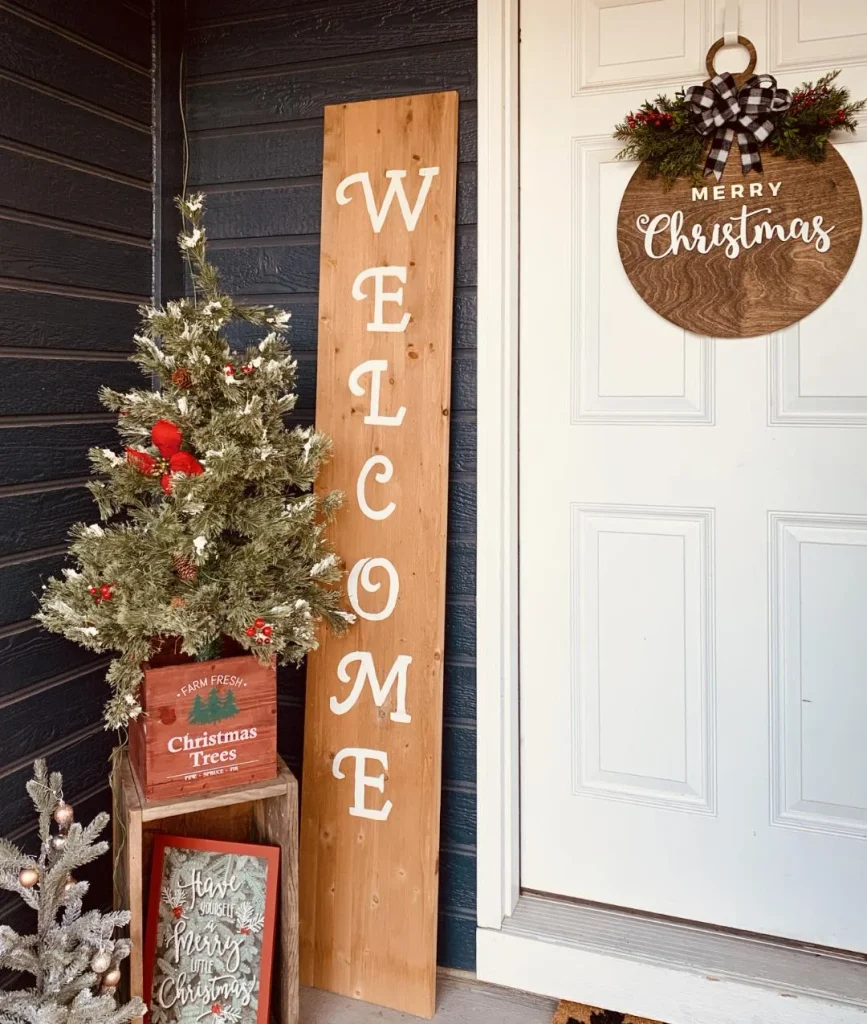
I love how this porch greets guests twice. A tall stained plank spells out WELCOME in creamy white letters.
A round wood sign hangs on the door like a giant ornament, with a plaid bow and fresh greenery on top. A frosted mini tree in a vintage crate fills the corner.
Craft formula: cedar plank + white paint + letter stencils + wood round + buffalo plaid ribbon + faux greenery
Quick steps:
- Sand a long cedar board and wipe off the dust.
- Stain it and let it dry fully.
- Tape your stencils in a vertical line and dab on white paint.
- Brush on two coats of exterior spar varnish.
Weatherproof tip: Lean the plank against the wall, not on wet ground. Slip a flat paver under the bottom edge. That one step stops moisture from wicking up the wood.
I hang the round sign under the porch roof. Rain ruins the lettering fast, and cover keeps it crisp all season.
Also read: 17 Christmas Lights Outside Ideas That Make Your House the Brightest on the Block
2. Painted Tire Christmas Scene
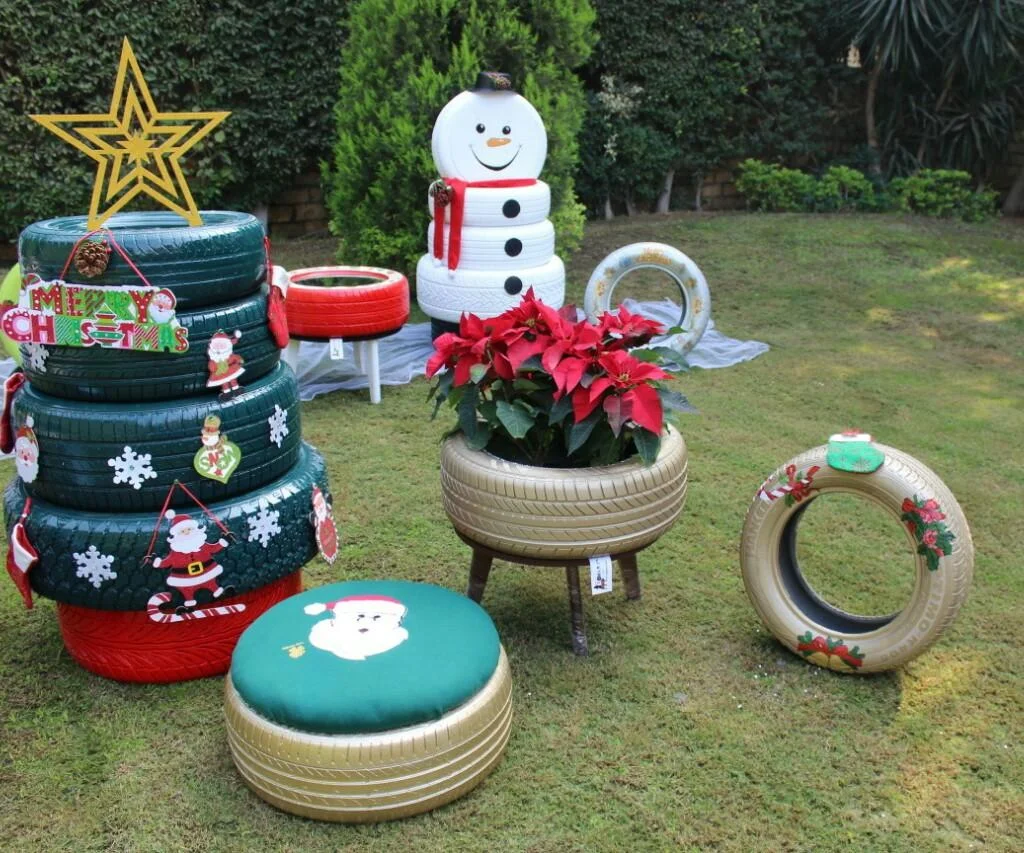
Old tires get a joyful second life here. Green tires stack into a Christmas tree with a gold star. White tires become a snowman. A gold tire cradles a red poinsettia, and another turns into a cushy seat.
Best for: Confident DIYers who want a big impact on a tiny budget.
Time: One weekend, plus drying time.
Why it works:
- Bold red, green, gold, and white colors read as Christmas from across the yard.
- Different shapes keep your eye moving around the scene.
- Painted tires hold up to rain and snow without extra work.
Make it: Scrub each tire with soapy water and let it dry. Spray it with paint made for rubber or all surfaces. Add stickers, ribbon, and a star topper last.
Avoid this: Don’t plant edibles in tires. Set the poinsettia in its nursery pot inside the tire instead. Then you can move it indoors when the nights turn cold.
Read more: 15 Christmas Crafts for Outdoors That Make Your Porch Look Magical
3. Fresh Evergreen Wreath with Pinecones
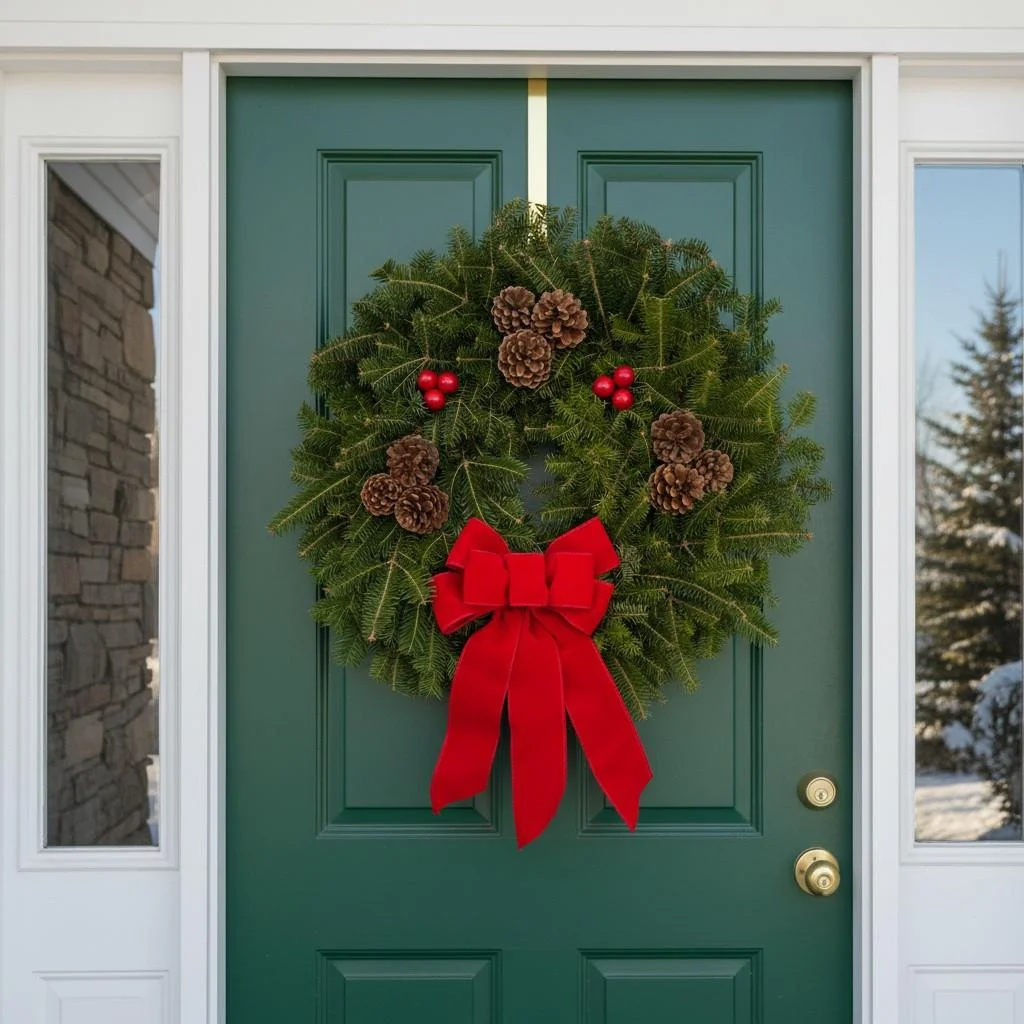
Some crafts never go out of style. This fresh fir wreath wears a cluster of pinecones, two pairs of red berries, and a big velvet bow.
The red pops against the deep green door. Here’s my favorite part: the wreath looks full and bushy, with no gaps.
Craft formula: wire wreath frame + fresh fir cuttings + floral wire + pinecones + red berry picks + velvet bow
Make it last:
- Soak your cuttings in water overnight before you start.
- Wire them in small bundles, overlapping each layer.
- Spray the finished wreath with anti-desiccant spray to slow needle drop.
Styling note: Keep the pinecones in groups of three. Odd numbers look natural. Tie the bow last and let the tails hang long.
Upgrade idea: Tuck in a few sprigs of cedar or pine for texture. Mixed greens give the wreath that expensive, florist-made look.
Read more: 15 Christmas Driveway Decorations Ideas That Make Every Car Slow Down
4. Pallet Wood Christmas Trees with Fairy Lights
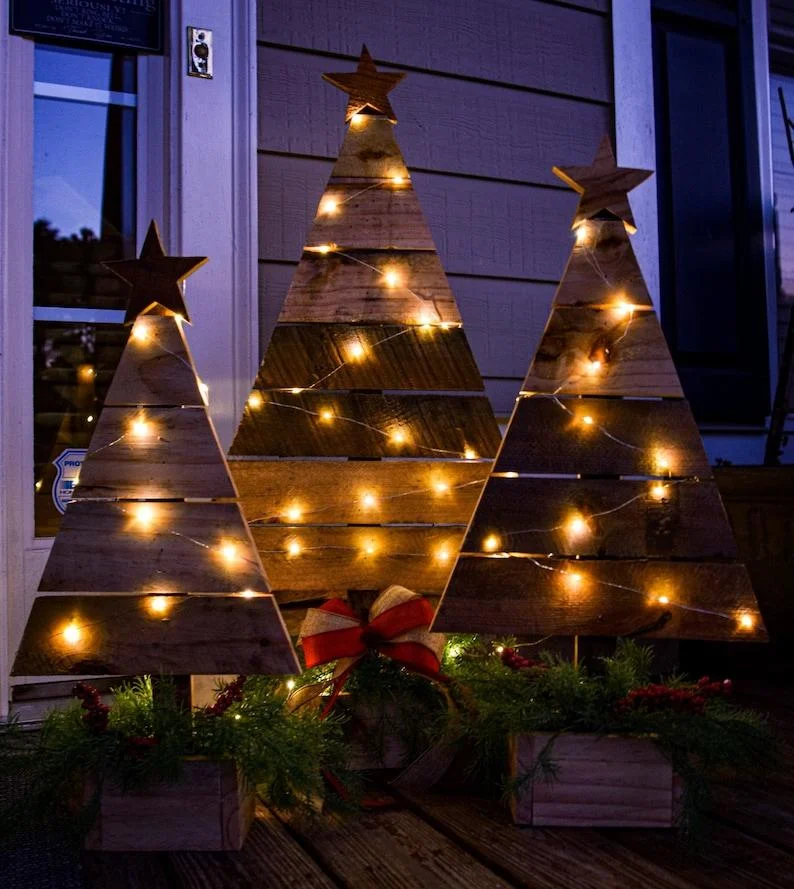
These three glowing trees steal the show at dusk. Rough pallet slats form each triangle, and a rustic wood star tops every one.
Fairy lights weave between the boards and cast warm pools of light. Wooden planter boxes at the base hold fresh greens and red berries.
Best for: Beginners who own a saw and a drill.
Budget hack: Free pallets do the heavy lifting here. Look for the “HT” stamp, which marks heat-treated wood. Skip any pallet stamped “MB.”
Light it up: Choose battery fairy lights with a timer. You skip the extension cords, and the lights turn on every evening without you.
Styling note: Make your trees three different heights. Place the tallest one in the middle. A bow tied at the base adds a pop of color and hides the support legs.
5. Grapevine Wreath with Pinecones and Berries
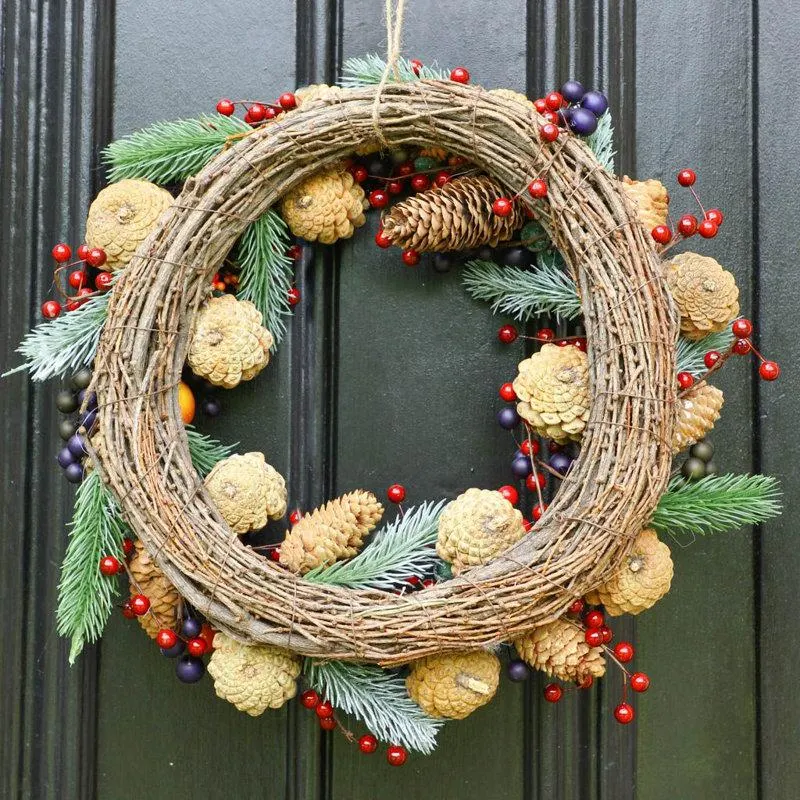
This wreath feels like a walk through a winter woodland. A natural grapevine base holds golden pinecones, frosted pine sprigs, and clusters of red and deep blue berries. The dark door makes every color glow.
Why it works:
- The tangled vine adds texture that a plain wreath can’t match.
- Mixed berry colors add depth without feeling busy.
- The open center lets the door color show through.
Quick steps:
- Plan your layout on a table first.
- Glue the big pinecones in place with hot glue.
- Wire in the pine sprigs and berry picks.
- Add a twine loop for hanging.
Pinecone tip: Bake gathered pinecones at 200°F for 30 minutes. The heat kills bugs and opens the scales.
Weatherproof tip: Hang it under cover. Rain can mold the vine and fade the berries.
Also read: 13 Christmas Front Door Decor Ideas That Make Your Entry Feel Instantly Festive
6. Glowing Candy Cane Lights
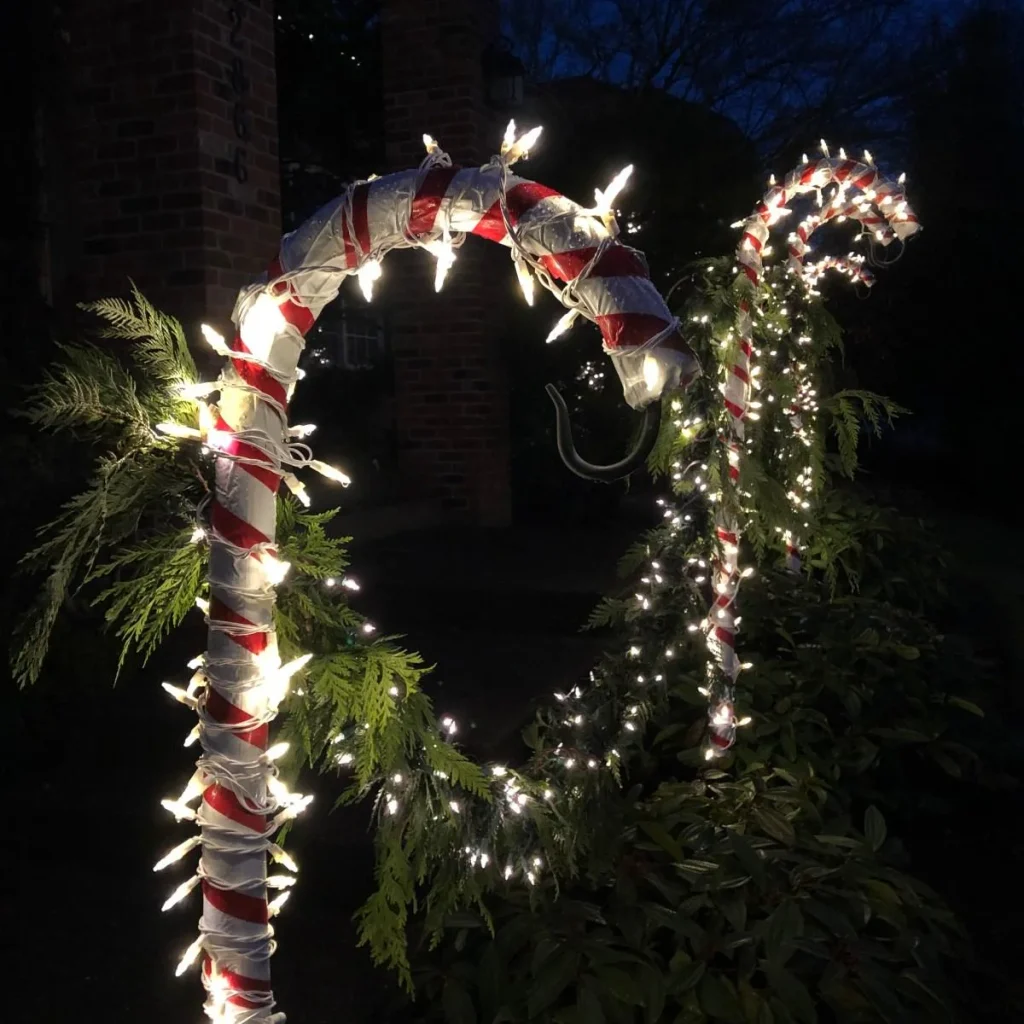
These giant candy canes turn a plain garden bed into a glowing show. Red and white stripes spiral up each cane. White lights wrap the whole thing, and fresh cedar boughs soften the base.
Craft formula: flexible tubing + red and white weatherproof tape + white mini lights + garden stakes + cedar boughs
Quick steps:
- Cut the tubing to your height and bend the top into a hook.
- Wrap it with red tape in a slow spiral.
- Wind the lights from bottom to top.
- Push a metal stake deep into the soil and tie the cane to it.
Light it up: Choose outdoor-rated lights and plug them into a GFCI outlet. Indoor lights fail fast in wet weather.
Avoid this: Don’t pull the tape tight. Cold air shrinks it, and tight tape peels. Leave a little slack.
7. Scrap Wood Trees on the Porch
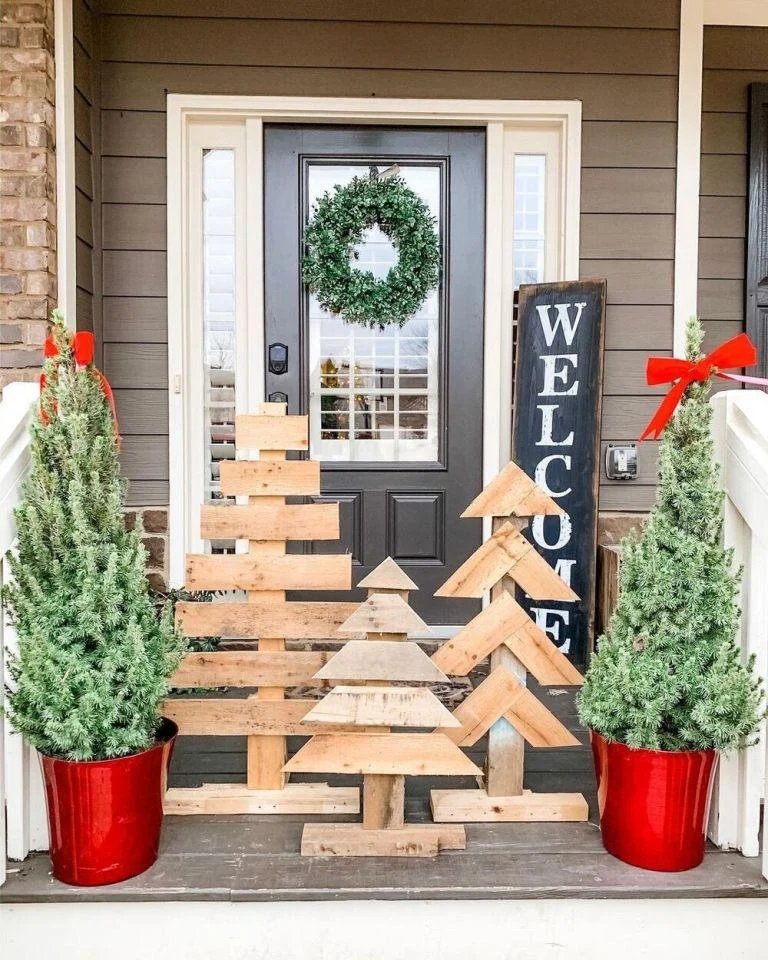
Leftover boards make two charming trees here. One has slats stacked on a center post. The other uses angled chevron boards.
Red pots with mini conifers stand guard on each side, and a black welcome sign leans against the wall.
Craft formula: scrap boards + center post + wood glue + exterior screws + clear sealer
Proportion tip: Cut your boards in graduated lengths, longest at the bottom. Build the trees in three heights. A varied group looks planned and polished.
Quick steps:
- Cut a stack of boards from longest to shortest.
- Fasten each board to the center post.
- Add a wide base so the tree stands straight in wind.
Why it works: The natural wood warms up the dark door. The red pots repeat the color of the berries and ribbon, which ties the whole porch together.
Bonus: Plant the mini conifers in your garden after the holidays.
8. Black and Gold Welcome Board
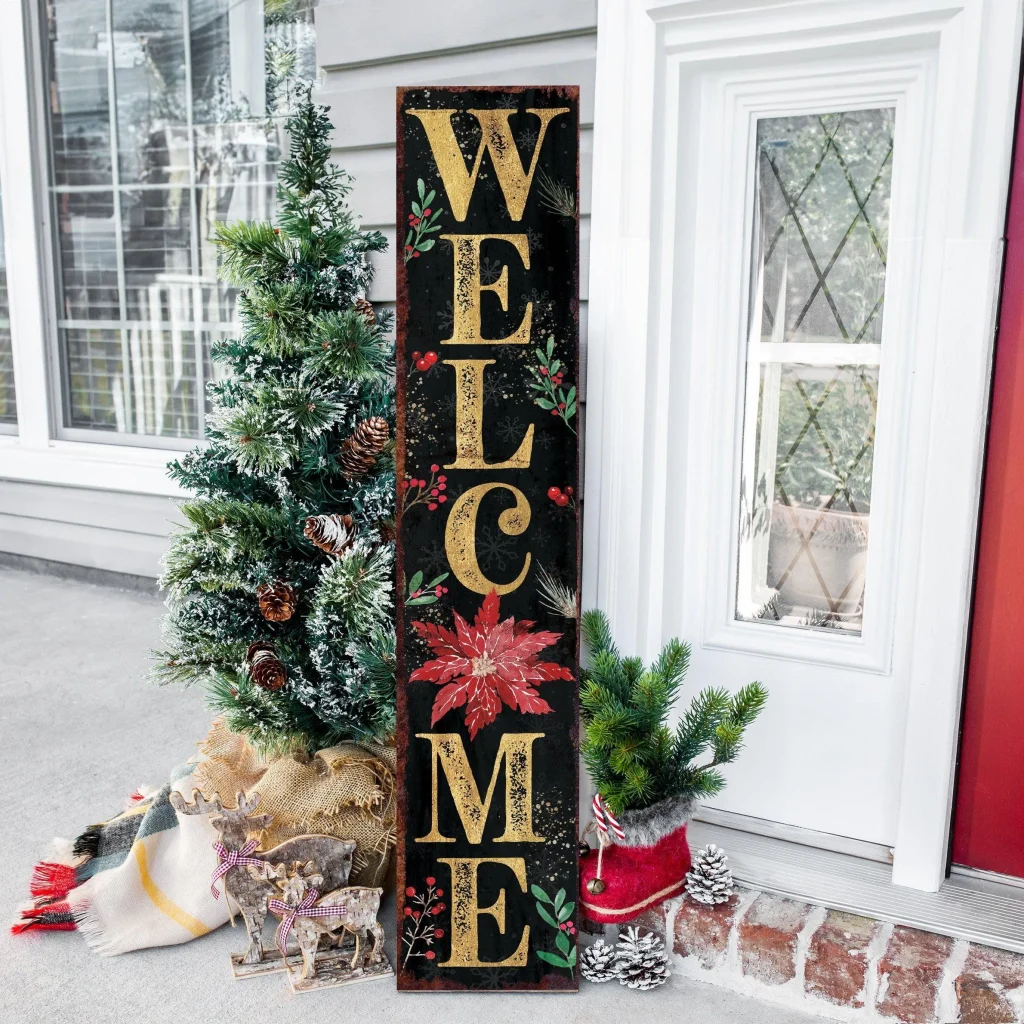
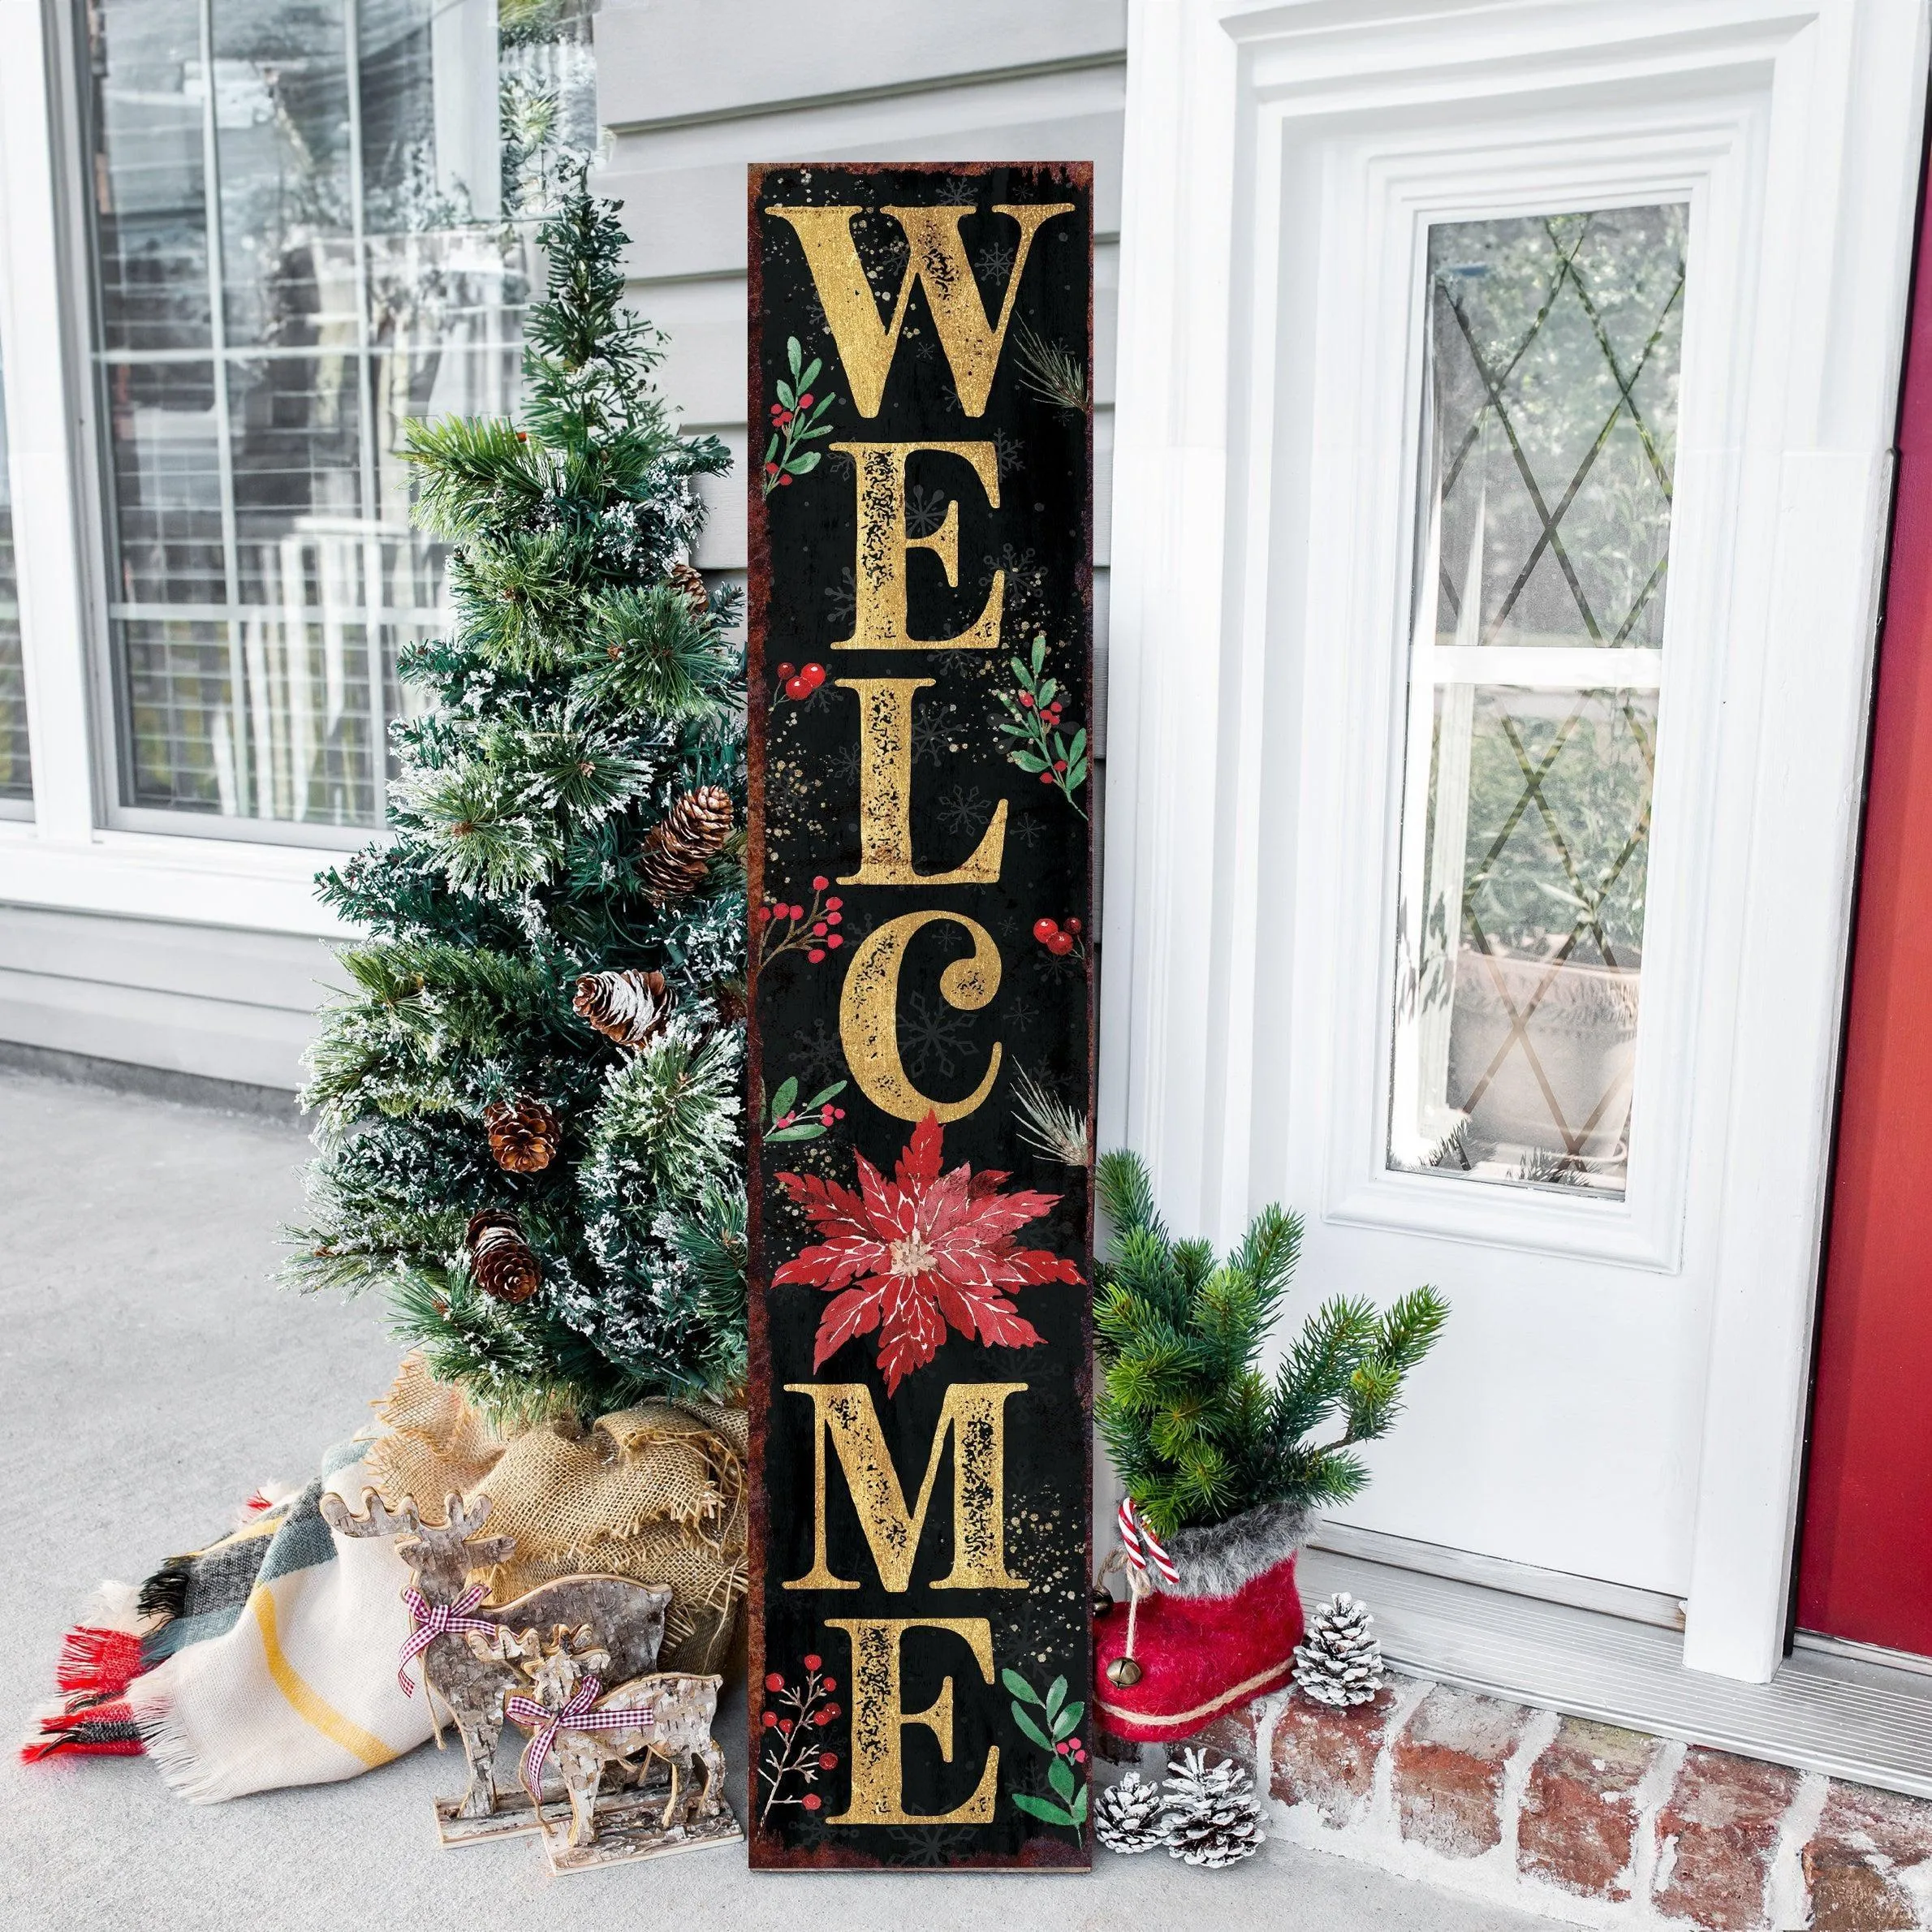
I call this the dressed-up cousin of the classic welcome sign. Gold letters glow against a rich black board.
A watercolor-style poinsettia sits between the letters, with holly and berries tucked around the edges. Birch reindeer, a plaid blanket, and a red felt boot add cozy layers at the base.
Decor formula: black board + gold lettering + poinsettia accent + burlap-wrapped tree + birch reindeer
Make it:
- Paint a tall board with matte black exterior paint.
- Add serif letters with a stencil and gold paint.
- Paint or stencil a poinsettia in the gap.
- Seal everything with a clear matte finish.
Upgrade idea: Brush on gold leaf instead of paint. It catches porch lights beautifully at night.
Styling note: Layer textures at the base. Burlap, plaid, and birch bark make the look warm instead of formal.
9. Pierced Tin Can Luminaries
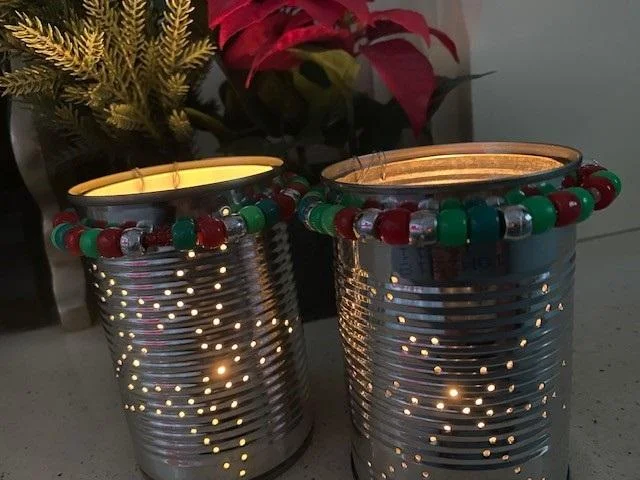
Recycling doesn’t get prettier than this. Each tin can glows through hundreds of tiny punched holes. A ring of red, green, and silver beads trims the rim and adds a playful touch.
Best for: Family craft night. It costs almost nothing.
Time: About 30 minutes per can.
Quick steps:
- Fill the can with water and freeze it. The ice keeps the metal from denting.
- Tape a dot pattern around the can.
- Punch holes with a hammer and nail.
- Thaw the ice and dry the can.
- Thread beads on wire and loop it around the rim.
Kid-friendly twist: Let the kids thread the beads. Keep the hammer for adults.
Avoid this: Skip real candles outside. Wind blows them out and tips cans over. Drop in flameless LED tea lights instead.
10. Giant Stacked Gift Boxes
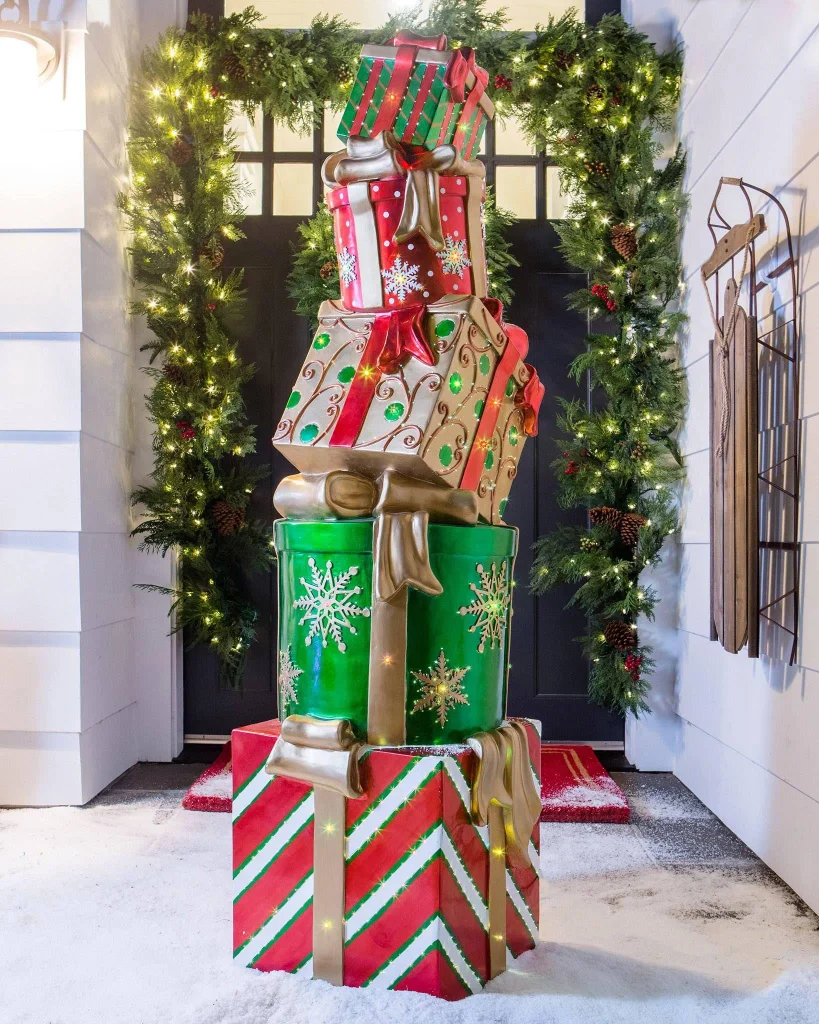
Nothing says Christmas like a mountain of presents. Five oversized boxes stack in a playful lean beside the front door.
Stripes, polka dots, and snowflakes give each box its own personality. Gold bows tie every layer. A lit garland frames the entry like a picture.
Craft formula: sturdy wood boxes or plastic totes + exterior paint + snowflake stencils + wide gold ribbon + string lights
Build tips:
- Make the bottom box the biggest and heaviest.
- Weigh it down with bricks or sandbags inside.
- Fasten the layers together with screws or heavy zip ties.
Weatherproof tip: Choose water-resistant outdoor ribbon. Plain fabric ribbon droops and fades in the first rain.
Avoid this: Don’t build with cardboard. It turns to mush overnight.
Styling note: Pick three colors and repeat them. That keeps a loud stack looking cohesive.
11. Plaid Gnome Christmas Tree
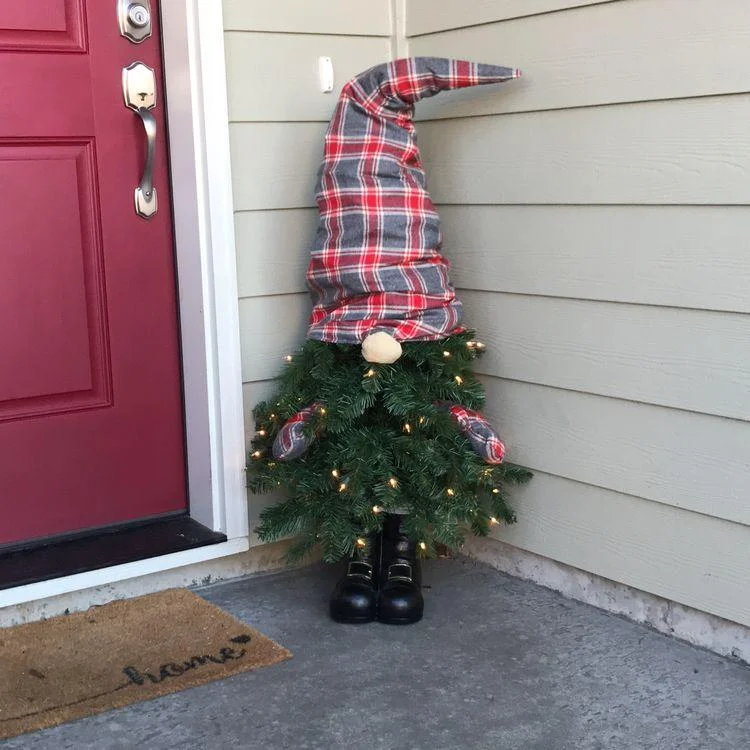
I can’t resist this little guy. A plaid hat flops over a small lit tree, so the tree becomes the gnome’s beard. A round cream nose peeks out below the brim.
Plaid mittens poke out from the branches, and black boots anchor the base. He guards the red front door like a tiny porch bouncer.
Craft formula: pre-lit mini tree + plaid fabric + polyfill stuffing + pom-pom nose + mitten pair + black rain boots
Quick steps:
- Sew or glue a tall cone from plaid flannel.
- Stuff it lightly so the tip bends.
- Slide the hat over the top of the tree.
- Tuck a pom-pom nose under the brim.
- Stand the tree inside the boots.
Weatherproof tip: Spray the hat with fabric water repellent. Drop a few bricks into the boots so wind can’t tip him over.
Kid-friendly twist: Let the kids pick the plaid and place the nose. They will name him before you finish.
12. Jute-Wrapped Star for the Fence
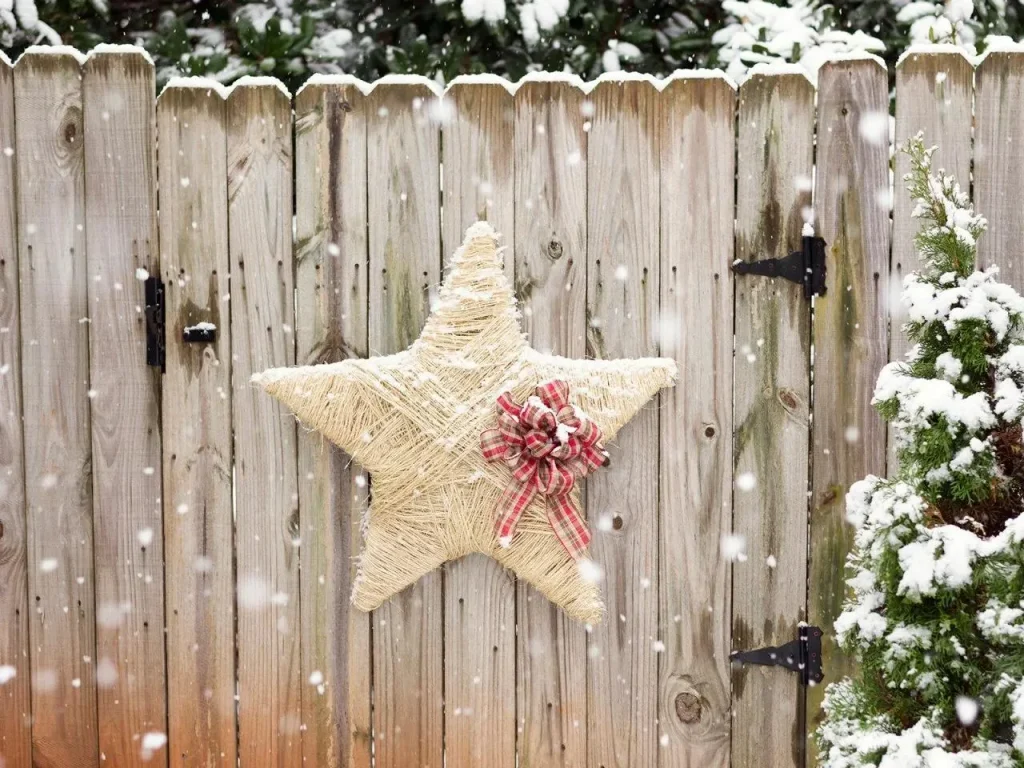
This star looks magical with snow clinging to it. Natural jute twine wraps round and round, and the woven texture catches every flake.
A plaid bow adds a touch of red. The weathered wood fence makes a perfect backdrop.
Best for: A beginner who wants a quick win.
Time: About one hour.
Why it works:
- Warm cream twine glows against gray wood.
- A single bow keeps the look clean.
- The big star shape reads well from the street.
Make it:
- Cut a star from sturdy cardboard or build one from thin wood strips.
- Wrap the twine in random, crisscrossing lines.
- Dab hot glue every few wraps to lock the twine in place.
- Tie on a wired plaid bow.
Hanging tip: Screw a small cup hook into the fence. Hook the star’s back wire over it. That keeps the star flat against the boards.
Avoid this: Don’t leave a cardboard star in heavy rain. Use wood strips for wet climates.
13. Pallet Christmas Tree with Ornaments
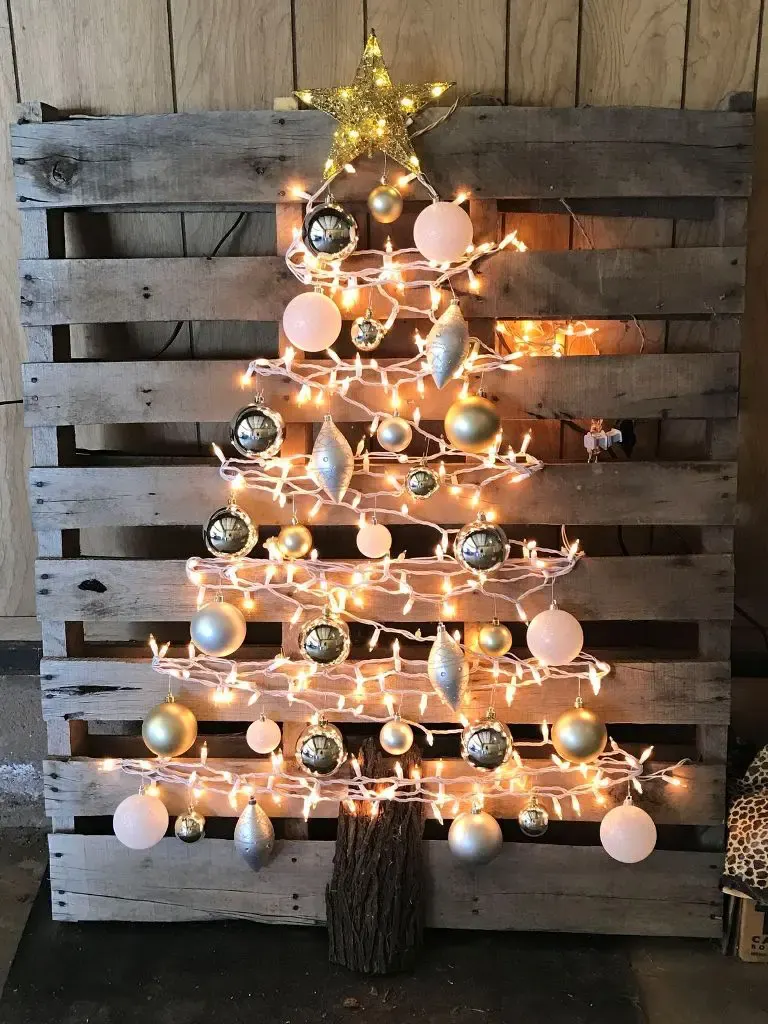
Here’s a tree that skips the pine needles. White string lights zigzag across the pallet slats in a triangle.
Silver, gold, and blush ornaments dangle between the boards. A glittery gold star crowns the top, and a rustic log anchors the base.
Decor formula: weathered pallet + white string lights + metallic ornaments + gold star + log base
Quick steps:
- Stand a pallet upright against a wall.
- Run the lights in wide zigzags, shortest rows at the top.
- Hang ornaments with wire hooks.
- Set the star on the top slat.
Light it up: Choose warm white lights for a cozy glow. Plug them into a GFCI outlet. That setup keeps your outdoor display safe.
Weatherproof tip: Use shatterproof ornaments. Glass cracks in the cold. Keep the pallet under a porch roof or carport so rain stays off the wood and the wiring.
Styling note: Repeat three colors only. Fewer colors make the tree look pulled together, not crowded.
14. Painted Gift Box Towers
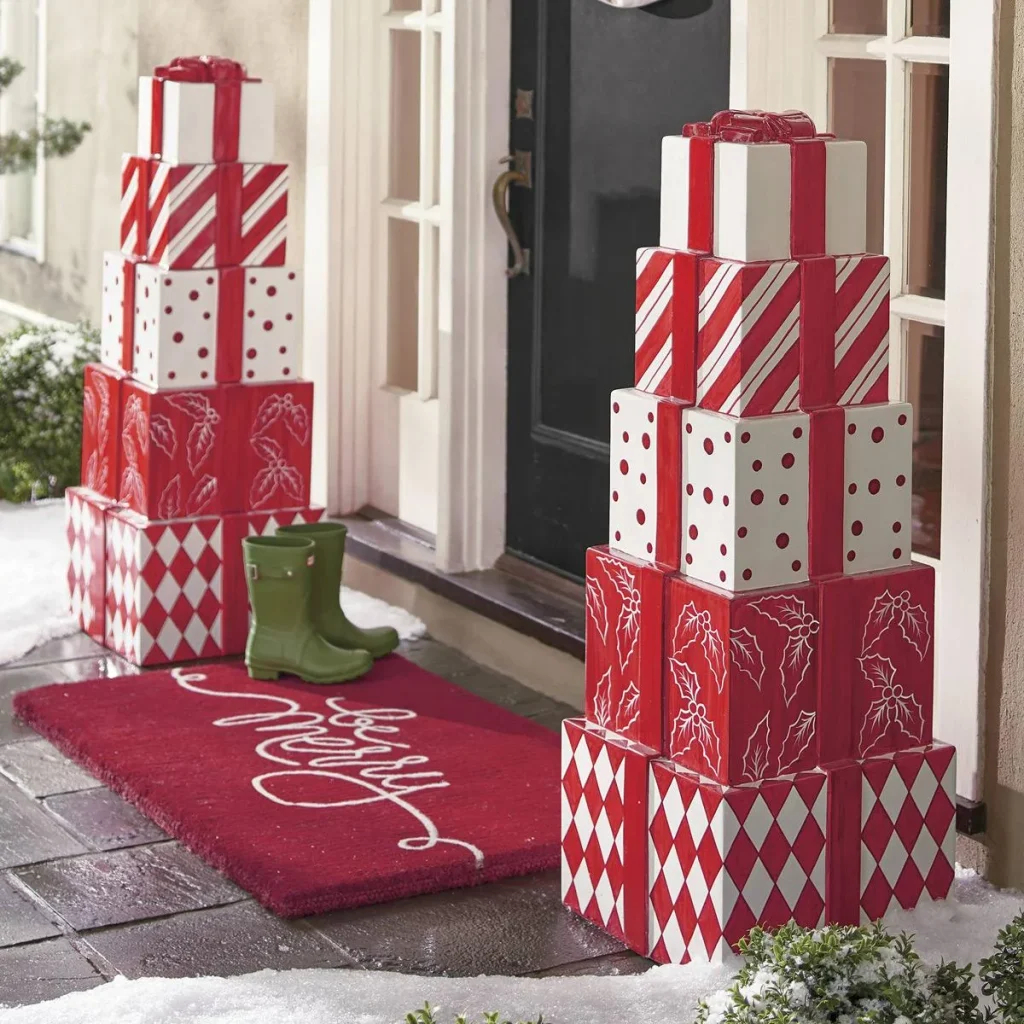
I adore how these towers use patterns to tell a story. Each box wears its own look. One has candy cane stripes. One has polka dots. One has hand-drawn holly.
The bottom box wears a bold harlequin print. A matching pair flanks the door, and a red “Merry” mat completes the scene.
Craft formula: wooden blocks or sturdy boxes + red and white exterior paint + painter’s tape + paint pens + red ribbon
Why it works:
- A red and white palette keeps loud patterns tidy.
- The towers get smaller toward the top, which makes them feel tall and balanced.
- Two matching stacks frame the door like pillars.
Make it:
- Paint every box white first.
- Tape off diamonds and stripes for crisp lines.
- Add dots with a round sponge brush.
- Draw the holly with a white paint pen over red.
Weatherproof tip: Seal every box with clear exterior varnish. Screw the layers together so wind can’t topple the tower.
15. Painted Rock Christmas Characters

These little rock friends make me smile. A Santa, a snowman, a penguin, and a reindeer sit in a cozy pile. Googly eyes give each one personality. Smooth stones from the garden or craft store work best.
Best for: Rainy-day crafting with kids.
Time: About 20 minutes per rock.
Quick steps:
- Wash the rocks and let them dry.
- Paint a base coat of white, black, or green.
- Add faces and hats with acrylic paint.
- Glue on the googly eyes.
- Spray with clear outdoor sealer.
Where to display them:
- Tuck them into a porch planter.
- Line them along a walkway.
- Nestle them under a small evergreen.
Budget hack: Collect free rocks from your own yard. Hunt for smooth, flat ones.
Weatherproof tip: Seal both sides of each rock. Rain washes bare paint away within a few weeks.
Time to Start Crafting
That’s 15 ways to make your outdoor space feel like Christmas. I hope a few of these made you want to grab a paintbrush.
Start small if you feel unsure. Paint a few rocks, wrap a star in twine, or hang a wreath. Then build up to a pallet tree or a gift box tower. Each project teaches you something new, and each one looks better with your own personal touch.
Remember the simple rules. Seal your paint, anchor anything tall, and use outdoor-rated lights. Those three habits keep your crafts looking fresh from December through New Year’s Day.